Supplies Needed:
Artwork~Suzanne Woolcott
You may purchase her tubes here
Scrapkit~Love and Hope by Jaelop Designs here
Mask~WSL mask 16 here
Font~ 2peas Heart's Delight
Thank you to everyone for all of your shares, without you, our creations just wouldn't be the same!!
For this tutorial you will need a working knowledge of PSP. I use PSP 9.
Now before we start remember that this tut is only a guide, your imagination and talent will make this tag your own!
Lets begin!!
Open a new Layer 650x650 white or depending on your forum you may choose to x out the background and we will resize later.
Choose a paper, I used paper 6 and copy and paste that as a new layer.
Go to Layers-Load/Save Mask-load mask from disk, choose your mask.
Merge group. Duplicate mask layer. We will move these mask layers around after we add the frame.
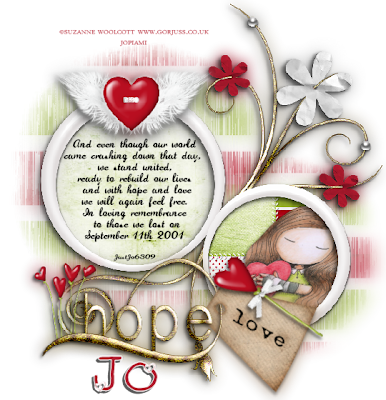
I then added JD element 34 and resized. Choose your papers and click inside each circle-modify-expand by 8 Invert and then hit delete and make sure you are on the paper layer when you do this. Move your papers below the frame layer.
With your tube of choice copy and paste. Now click inside your frame, modify-expand by 8 Invert and then hit delete and make sure you are on the tube layer when you do this. Move your tube below the frame layer but above the paper layer.
On one circle I added some words, which I thought were appropriate. You can use mine or add your own. And even though our world came crashing down that day, we stand united, ready to build our lives and with hope and love we will again feel free. In loving remembrance to those
we lost on September 11th, 2001.
Add your embellishments of choice. I added JD element 43, resized it and JD element 52, resized it by using the deform tool and erased part of it so it looked like it was entwined with hope.
I added JD element 27 and again using the deform tool resized it and rotated it to sit on top of the love tag.
I added JD element 28, resized it and placed it on top of the larger
circle.
Add your dropshadows and then go back to your mask layers and resize and move them around under the circles.
I now resize my tag to about 585x585 and then add copyrights. Add your name and x out the background if you wish and save as a PNG or a JPEG and you are done!!
Thank you for trying out my tut any similiarities to any other tuts is by coincidence only or great minds think alike..lol
If you'd like to show off your tag email me cutiepie_2468@hotmail.com I'd love to see what you've created.
Written and created by JustJo63 25th August 2009


No comments:
Post a Comment