Sunday, September 20, 2009

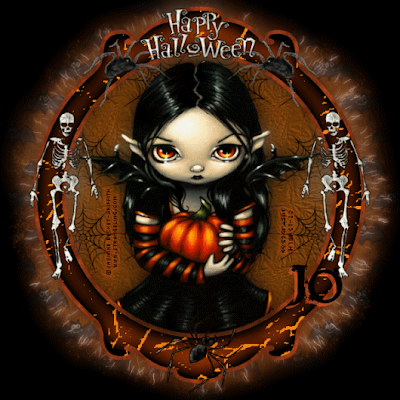
Electrifying!


Supplies needed:
Tubes~Jasmine Becket-Griffith
You may purchase her tubes here
Scrapkit~A Halloween collab kit and I'm using the one by Loeckchen here

Mask~WSL mask 119 here
Font~Requiem


For this tutorial you will need a working knowledge of PSP and Animation Shop. I use PSP 9.

Thank you to everyone for all of their shares, without you, our creations just wouldn't be the same!!

Now before we start, remember that this tut is only a guide, your imagination and talent will make this tag your own!

Open a New Layer 650x650 and copy and paste a paper of choice, I used paper 2e.

Go to Layers-Load/Save Mask-load mask from disk, choose your mask.
Merge group.


Copy and paste a frame of choice, I used frame L and add a drop shadow. Click on the frame and use your wand and click inside and copy and paste a paper of choice, I used paper 3f. Modify-expand by 8-invert-delete.

I added my tube, resized a little using the raster deform tool and erased any overhang. Next drop shadow and then duplicate the tube and on the original go to blur-gaussian blur-15.
Add your name, I used Requiem and an orange dropshadow and then add copyrights.
I made my background black.

Time for some animation.

Click on your mask layer.

Go to Effects-Plugins-Alien Skin Xenofex2-Electrify-10-15-30-50-50-50 click ok
Copy merged into Animation Shop
Back to PSP and using the same settings just click on random seed click ok
Copy merged into AS-right click- paste- after current frame
Back to PSP again use the same settings click on random seed click ok
Copy merged into AS again-right click-paste-after current frame
Now save your tag.

Thank you for trying out my tut any similiarities to any other tuts is by coincidence only or great minds think alike..lol
If you'd like to show off your tag email me cutiepie_2468@hotmail.com I'd love to see what you've created.

Written and created by JustJo63 20th September, 2009

Bewitching

Supplies needed: Tubes~Caron Vinson You may purchase her tubes at here Scrapkit~It's Halloween by Lacarolita here Mask~WSL mask 192 here Font~Harlow Solid Italic For this tutorial you will need a working knowledge of PSP. I use PSP 9. Thank you to everyone for all of their shares, without you, our creations just wouldn't be the same!! Now before we start, remember that this tut is only a guide, your imagination and talent will make this tag your own! Open a New Layer 650x650 and copy and paste a paper of choice, I used paper 5 Go to Layers-Load/Save Mask-load mask from disk, choose your mask. Merge group. Copy and paste a frame of choice, I used frame 2 and add a drop shadow. Click on the frame and use your wand and click inside and copy and paste a paper of choice, I used paper 5 again. Modify-expand by 8-invert-delete. The first tube I used is more of a closeup. I resized a little and made it look like it's in the frame but on top. Erase any overhangs.Add your drop shadow. Now add your embellishments of choice. I used broom 1 and resized it using the raster deform tool and then rotating it to fit across the front of the frame and added a drop shadow. Next I added a sitting tube from Caron Vinson so it looks like she's on the broomstick. Resize the tube using the raster deform tool, I find this works best. Add a drop shadow. Once I had the tag looking as I wanted it, I added the moon behind the frame but on top of the mask layer. Duplicate the moon and on the original add blur-gaussian blur-15. The I added the tree, under the frame but on top of the moon. Resize using the raster deform tool and add a drop shadow. I then typed out Bewitching using paper 6 with an orange outline. I also added one of the bats. I now cropped my tag to make it a little bit smaller and then added copyrights. Add your name and x out the background if you wish, I kept the black background and save as a PNG or a JPEG and you are done!! Thank you for trying out my tut any similiarities to any other tuts is by coincidence only or great minds think alike..lol If you'd like to show off your tag email me cutiepie_2468@hotmail.com I'd love to see what you've created. Written and created by JustJo63 20th September, 2009

Friday, August 28, 2009

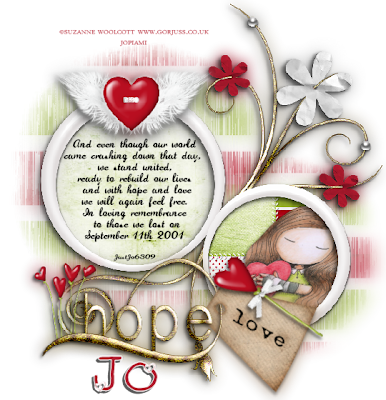
In Remembrance~Love and Hope


Supplies Needed:
Artwork~Suzanne Woolcott
You may purchase her tubes here
Scrapkit~Love and Hope by Jaelop Designs here
Mask~WSL mask 16 here
Font~ 2peas Heart's Delight

Thank you to everyone for all of your shares, without you, our creations just wouldn't be the same!!

For this tutorial you will need a working knowledge of PSP. I use PSP 9.


Now before we start remember that this tut is only a guide, your imagination and talent will make this tag your own!


Lets begin!!

Open a new Layer 650x650 white or depending on your forum you may choose to x out the background and we will resize later.

Choose a paper, I used paper 6 and copy and paste that as a new layer.
Go to Layers-Load/Save Mask-load mask from disk, choose your mask.
Merge group. Duplicate mask layer. We will move these mask layers around after we add the frame.

I then added JD element 34 and resized. Choose your papers and click inside each circle-modify-expand by 8 Invert and then hit delete and make sure you are on the paper layer when you do this. Move your papers below the frame layer.
With your tube of choice copy and paste. Now click inside your frame, modify-expand by 8 Invert and then hit delete and make sure you are on the tube layer when you do this. Move your tube below the frame layer but above the paper layer.
On one circle I added some words, which I thought were appropriate. You can use mine or add your own. And even though our world came crashing down that day, we stand united, ready to build our lives and with hope and love we will again feel free. In loving remembrance to those
we lost on September 11th, 2001.

Add your embellishments of choice. I added JD element 43, resized it and JD element 52, resized it by using the deform tool and erased part of it so it looked like it was entwined with hope.
I added JD element 27 and again using the deform tool resized it and rotated it to sit on top of the love tag.
I added JD element 28, resized it and placed it on top of the larger
circle.
Add your dropshadows and then go back to your mask layers and resize and move them around under the circles.
I now resize my tag to about 585x585 and then add copyrights. Add your name and x out the background if you wish and save as a PNG or a JPEG and you are done!!

Thank you for trying out my tut any similiarities to any other tuts is by coincidence only or great minds think alike..lol
If you'd like to show off your tag email me cutiepie_2468@hotmail.com I'd love to see what you've created.

Written and created by JustJo63 25th August 2009

Sad News

It's with great sadness that I type this latest note.

My daughter Hayley went to have her ultrasound yesterday and sadly they couldn't find a heartbeat. My heart breaks for her and Mat but I feel some relief knowing that they have their happy and healthy little boy Aidan.

I've been trying to write new tuts for a few days now and finally got one finished today, which I will post in a few minutes. I'm just trying to keep busy because I can't be there with them.

Friday, August 21, 2009

OH BABY!! On The Move!!

I'm so happy to announce that I'm going to be a grandmother again and again...lol.

Both of my twins, Hayley and Marissa are expecting next March and we just found out the due dates~Missy 8th and Hayley~13th...5 days apart!!! I'm hoping when Hayley has her ultrasound that she's a little further away, I don't know how I'm going to cope if they have them on the same day...oh baby!! Missy had her first ultrasound and the baby looks healthy.

Having said all that brings me to the next lot of news. We have decided to move closer to the girls, so we are packing up and going to Tasmania. This is going to be a big move, I've never lived anywhere but Sydney, neither has Sarah but Mike's lived all over the world. My son has decided to stay and is now looking for somewhere to live.

I'm really going to try to get some tuts done. I seem to make new tags all the time but don't spend anymore time writing them down.

Well that's my news for now!

Jo x x x

I'm Back!! I've been tagged!

Well it's been awhile and seeing as though my dear friend Karen has tagged me I thought I'd do the right thing and post something..LOL..ty so much Karen!

I've Been Tagged
I’ve been tagged by Karen! Thank you sweetie ♥
THREE NAMES I GO BY:
Jo, Joanne, Joey
*****
THREE PLACES I HAVE LIVED:
Kingsgrove, Padstow Heights and Revesby
*****
THREE THINGS I LIKE TO WATCH:
Greys Anatomy, Supernatural and Ghost Whisperer
*****
THREE PLACES I HAVE BEEN:
Fiji, USA and Tassie
*****
THREE OF MY FAVOURITE FOODS:
Italian, Chinese and BBQ
*****
THREE THINGS I AM LOOKING FORWARD TO:
Moving closer to my twins, Two new grandchildren next March and owning a home!
*****
THREE OF YOUR FAVORITE PEOPLE:
Mike, My kids, My family
*****
THREE FAVORITE COLOURS:
Blue, Blue and Silver..lol
*****
THREE FAVORITE BOOKS/AUTHORS:
Robin Cook, Dan Brown and Stephanie Meyer
*****
THREE THINGS YOUR GOING TO DO TODAY:
Facebook, PSP and Eat..hehe
*****
PASS THIS ON TO 5 BLOGS TO FIND OUT THREE THINGS ABOUT YOUR FRIENDS
I've been out of the loop for so long I'll have to go find some blogs..LOL

Sunday, June 7, 2009

Back From Tassie!

Well here I am back from Tassie and simply not motivated to write any tuts! I'm still making tags though and I need to get back to collecting those wonderful scrapkits too.
Stay tuned...I'm sure I'll get a new tut up soon!

Jo x x x

Saturday, May 16, 2009

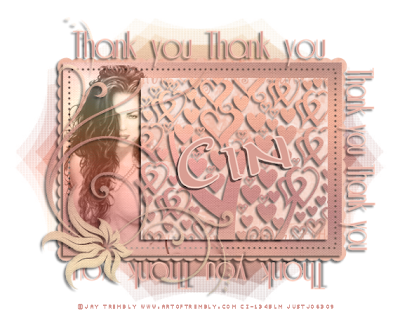
Thank you~FTU


Dedicated to my BFF Colette, ty sweetie, I truly appreciate your friendship!

For this tutorial you will need a working knowledge of PSP. I use PSP 9.


Supplies: I have used a beautiful scrapkit by Cin called Ophelia from Juicy Bits
here
Tube/Image of Choice: I am using a tube by Jay Trembly which you will need a licence
to use. Those tubes are sold here
Mask of Choice or Zuzzana Mask 01
here
Template #29 by Missy
here

Thank you all for sharing your talent with us!

Font of Choice: Riesling

Now before we start remember that this tut is only a guide, your imagination and talent will make this tag your own!

Open up the template in psp go to image canvas size to 650 by 650 delete the watermark add a new raster layer flood fill with white move to the bottom of layer palette.

Copy and paste a paper of choice then go to masks, select your mask of choice, merge.

Click on each layer go to selection- select all- float- defloat from the kit copy and paste as a new layer paper of choice selection- invert- delete select none.

Do the same on the ivy layer.

On the larger rectangle take your selection tool and draw a rectangle around it, you should have marching ants. Copy and paste your tube inside these then invert-delete. Lower the opacity on your tube to about 65 and go to blend mode-luminance-legacy.

Now go to the smallest rectangle take your selection tool again and draw a rectangle around it. Copy and paste the hrt tree inside the marching ants then invert-delete.

Go to your text tool and type out Thank you around your tag. I found it easier to type it up the top, convert to a raster layer, drop shadow.
Then continue around the tag the same way.

Delete all the original layers of the template once you're happy with everything. Drop shadow all the layers.


Crop your tag. Resize if you wish.
Add your copyrights, add your name, x out the bottom layer (for forums) and save as a PNG or as a JPEG!


If you wish to show me your tag, I'd love to see it. You can email me at
cutiepie_2468@hotmail.com

This is my own original idea/concept so if this looks like someone elses tag, it is purely coincidental.
JustJo6309 15th May 2009

Friday, May 15, 2009

(*(*(*(HAPPY 1ST BIRTHDAY AIDAN)*)*)*)Off To Tassie!!


I just wanted to let everyone know that I am off to Tasmania this Thursday 21st May, 2009. My grandson Aidan turns one on the 25th and Sarah and I are flying out a bit earlier. We are also going there to help my daughters Hayley (Aidans mum) and Marissa and my future son-in-law Mat move house. How's that for timing?? LOL

Mike is leaving Friday and driving to Melbourne to catch the Spirit of Tasmania ferry across. He's taking our luggage and some very prize possessions for a friend. He's also bringing some of Marissa's things too, which she couldn't get there when she moved down a year ago.

There's also someone else going but it's a surprise for Hayley, she has no idea her big brother is travelling with us on Thursday, so one big happy family!!!

I can't believe it's been almost a year since Aidan arrived and he's gotten more gorgeous everyday! Not that I'm a biased grandmother at all...LOL

I put a few of his photos in a frame and thought I'd post it here to show him off.

I'll try to get a few more tuts posted before I leave.

Jo x x x


Janesko Beauties~FTU~Animated


For this tutorial you will need a working knowledge of PSP. I use PSP 9. This tut is animated, so a working knowledge of AS is also needed.

Supplies: I have used a cluster frame from Vaybs which you can get
here

Tube/Image of Choice: I am using a few tubes and images by Jennifer Janesko which you will need a licence to use. Those tubes are sold here

Mask of Choice or Vaybs mask 6
here

Thank you all for sharing your talent with us!


Font of Choice: Trinigan


Now before we start remember that this tut is only a guide, your imagination and talent will make this tag your own!

Open a New Layer 650x650 and flood fill black then add a new raster layer fill with colour.

Go to Layers-Load/Save Mask-load mask from disk, choose your mask.
Merge group.

Go to Xenofex-crumple and use these settings on your mask layer. 5.25-50-60-58-19.47-51.20-50-Distort image.


Copy and paste the cluster frame and add a drop shadow. Click on the frame and use your wand and click inside each part of the frame
and copy and paste a paper of choice or images/tubes of choice as I have done. Modify-expand by 6-invert-delete.

Add your copyrights and name. If you don't wish to animate your tag, x out the bottom layer and save as a png.

Animation~

Click on the mask layer.

Xenofex constellation~small star constellation

Settings:
2.58-100-20-4-50-40-45-keep original

Copy merged and paste into AS

Back to PSP

Undo

Click on your mask layer again-xenofex and click on random seed once.

Copy merged and right click on the first frame-paste-after current frame

Back to PSP

Undo

Click on your mask layer again-xenofex and click on random seed once.

Copy merged and right click on the frame-paste-after current frame

File-save as-name your tag and save as a gif!

I hope you found this tut easy to do and if you'd like to show me please feel free to email me here

Written and created by JustJo63 15th May 2009

Wednesday, May 13, 2009

My first award!


I'm so excited, Karen, a dear friend of mine has given me my very first award...thank you so much!
The rules are - Put the name and link of who gave you this award on your blog.
Then pass it on to 10 blogs which you think deserve it.

Here are 10 magical blogs of my choosing
Nikki of cutensweetnikki's tuts
Monica of Simply Sensational Scraps
Lorna of Simply Sensational Scraps
Sue of Wacky Winnies
Sue of Sues Designz
Sue of Tutorials By Sue
Sylvie of Eyecandii Tutorialz
Chatita of Chatita's Tutorials
Doris of Scraps Dimensions
Vaybs of Designs By Vaybs

Friday, May 8, 2009

Do Not Disturb~FTU


For this tutorial you will need a working knowledge of PSP. I use PSP 9. This is a very quick and easy tut!

Supplies: I have used a very bright scrapkit called Lustful Raspberry from Juicy Bits! You can get this scrapkit from here
Thank you for sharing!
Tube of Choice: I am using a great tube from Keith Garvey which you will need a licence
to use. Those tubes are sold here
Mask of choice
Thank you all for sharing your talent with us! And don't forget that when you go to download these supplies, please leave a thank you for the creators!
Font of Choice: Requiem

Now before we start remember that this tut is only a guide, your imagination and talent will make this tag your own!


Open a New Layer 650x650 copy and paste your paper I used paper 2.
Go to Layers-Load/Save Mask-load mask from disk, choose your mask. Merge group.
copy and paste frame 2, drop shadow. Then click in the middle of the frame with your wand, copy and paste paper 9, invert-delete.

Copy and paste flower 3, drop shadow. Then copy and paste your tube, resize it a little and place it on top of the flower.

Now add your wordart, add a drop shadow. I added a couple of embellishments and on the tag part I typed, Do Not Disturb.

I now resized my tag to make it a little bit smaller and then added copyrights. Add your name and x out the background if you wish (this tag looks great on a black background)
and save as a PNG or a JPEG and you are done!!

Thank you for trying out my tut any similiarities to any other tuts is by coincidence only or great minds think alike..lol
If you'd like to show off your tag email me cutiepie_2468@hotmail.com I'd love to see what you've created.

Written and created by JustJo63 8th May 2009

Wednesday, May 6, 2009

Life Is Pretty Tough Sometimes!

Well I haven't had a ramble in awhile, so why not now? LOL

I guess the title says it all!! Seems all around the world people are doing it tough, some more than others. We have this Swine flu, which the media keeps reporting on and I think scaring more people than needed. They keep showing us a vaccine that will stop it, so shouldn't that be the end of the scare? I say give us the facts, help us to understand what or if we need to do anything and point us in the direction of the cure if we do need it, don't panic people, keep them calm! I think everyone has enough to worry about right now the way the economy is. I was watching 20/20 and it was so terribly sad to see people in shelters with their kids because they've lost their jobs and can't afford their rent anymore. Those kids had to leave pretty much everything behind, now that's tough when you have to leave your beloved dolls, cars and games and go and live in one room, share a bed and not know when you will have a normal life again! Even tougher for the parents who want to give their kids everything but especially a roof over their heads and food on their table and a bed to sleep in each night!!

My other half is finding it very hard to get a job right now. He's an American, living here on a visa, which cost quite a bit of money. We did all the paperwork, paid the fee and all they really do is say yes or no. It was quite nerve wracking going through that because he had to change his visa asap because he was retrenched from his job here and his other visa stated he could ONLY work for them!! If he hadn't of changed his visa in time he'd have had to go back to the US. Thankfully they gave him a small payout which kept us going for awhile. Now he is an aircraft mechanic, licensed to work on all aircraft, helicopters, fixed wing etc. Most aircraft in Australia is American made, not all, but most. For him to actually work and sign off on these aircraft, here in Australia, he needs his Australian licenses. If they are N registered (still on the US registry) he can work on them, sign off on them etc. but if they are Aussie registered he can't. Now you may say, well no problem there, wrong! He will need to sit exams to get his Aussie licenses, which costs money, quite a bit actually, to work on AMERICAN MADE aircraft!! He's been an aircraft mechanic for almost 36 years and the Aussie powers-that-be do not recognise LAME's (licensed aircraft mechanical engineers) from the USA. The weirdest and most ridiculous thing is that they recognise mechanics from elsewhere around the world and they can work on the AMERICAN made aircraft here in Australia!! He is also a DAR (Designated Airworthiness Representative) and an IA (Inspector). He has worked all over the world. He was in the US Air force for over 20 years, that's where he became an aircraft mechanic. He's so damn clever and yet he can't get a job here, simply because of licensing issues. At the moment we simply can't afford for him to take exams he doesn't need to take in the first place! I am looking for work but they want young ones, all rounders, someone with certificates etc. etc. So yes, we're doing it pretty tough right now too.

On to another thing...Mothers Day! I'd like to wish all of the mothers out there a very happy, enjoyable and relaxing Mothers Day on Sunday (I know the Brits have had theirs..lol). I probably won't be doing anything because my mother lives a few hours away and we honestly can't afford to drive down there right now but she knows I love her and I'll call her on the day. I'm not sure who will be here this year. My other half is chasing up work in Queensland, my son will probably be working, my twins live in Tasmania, so that leaves Sarah and I!

Anyway, enough rambling, I don't want to bore anyone who reads this..lol

Stay tuned for more sagas and tuts from me.

Jo x x x

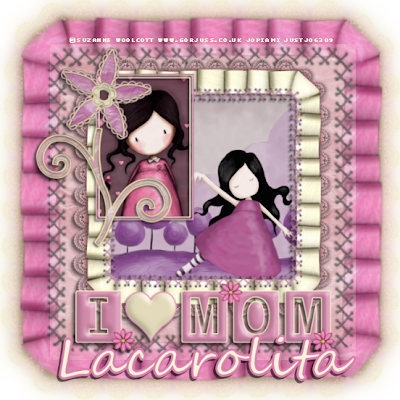
I Love Mom~FTU


For this tutorial you will need a working knowledge of PSP. I use PSP 9. This is a very quick and easy tut!

Supplies: I have used a very pretty scrapkit called I ♥ Mom! You can get this scrapkit from Lacarolita
here
Thank you for sharing!
Tube and Image of Choice: I am using a Suzanne Woolcott tube and an image which you will need a licence
to use. Those tubes are sold here
No mask for this tut.
Thank you all for sharing your talent with us! And don't forget that when you go to download these supplies, please
leave a thank you for the creators!

Font of Choice: Segoe Script

Now before we start remember that this tut is only a guide, your imagination and talent will make this tag your own!

Note: You will need to resize each paper and element as these are quite large.

Open a New Layer 650x650 and copy and paste frame 3, drop shadow. With your wand click inside the frame and paste paper 5.
Merge down and duplicate. On the original go to blur-gaussian blur-15.

Next copy and paste frame 2 and resize it so it fits inside frame 3. Copy and paste tube/image of choice.
With your wand click inside the frame-Modify-expand by 20-invert-delete.

Copy and paste frame 1, resize.Use my tag as a guide as to where to place it. Copy and paste your tube and resize.
Click inside the frame modify-expand by 5-invert-delete. Add your dropshadows to each frame.

Merge these frame layers together and duplicate.
On the original go to blur-gaussian blur-15.

Now add your I ♥ MOM wordart, add a drop shadow.


I now resized my tag to make it a little bit smaller and then added copyrights. Add your name and x out the background if you wish
and save as a PNG or a JPEG and you are done!!

Thank you for trying out my tut any similiarities to any other tuts is by coincidence only or great minds think alike..lol
If you'd like to show off your tag email me cutiepie_2468@hotmail.com I'd love to see what you've created.

Written and created by JustJo63 6th May 2009

For The Love Of Music~FTU


For this tutorial you will need a working knowledge of PSP. I use PSP 9.

Supplies: I have used a beautiful scrapkit called Music Of The Night! I've seen a few tuts created with this kit and I can't believe how different they are. You can get this scrapkit from Jamie Dell
here
Thank you for sharing!

Tube of Choice: I am using an Archie Dickens tube which you will need a licence
to use. Those tubes are sold here

Mask of Choice or WSL_Mask 4 which you can find here

Thank you all for sharing your talent with us! And don't forget that when you go to download these supplies, please leave a thank you for the creators!

Fonts of Choice: Pristina and Aniron

Now before we start remember that this tut is only a guide, your imagination and talent will make this tag your own!

Note: You will need to resize each paper and element as these are quite large.

Open a New Layer 650x650 and copy and paste a paper of choice, I used paper 11

Go to Layers-Load/Save Mask-load mask from disk, choose your mask. Merge group.


Copy and paste the heart, add a drop shadow. Next I added the ribbon circle and resized, next add paper of choice I used paper 1.
Click on the ribbon circle and use your wand and click inside and copy and paste a paper of choice. Modify-expand by 7-invert-delete. Add your drop shadow.

Now add your embellishments of choice.Use my tag as a guide. I added the MUSIC wordart and placed the tree and leaf behind it.

I then added my tube and resized it a little and made it look as if she was sitting on the MUSIC wordart. I then added the music wings resized them and rotated them and placed them behind the girl so it looks like she has wings.

Now x out the background layer, tube, mask and MUSIC layer. Merge the other layers visible. Go to effects Eyecandy 4000-gradient glow and
outline with a colour of choice.

Go back and un x the other layers go to MUSIC and type the words For The Love Of and then drop shadow. Go to Eyecandy again put a gradient glow around both of these, one at a time, different colours work well.

I now resized my tag to make it a little bit smaller and then added copyrights. Add your name and x out the background if you wish and save as a PNG or a JPEG and you are done!!

Thank you for trying out my tut any similiarities to any other tuts is by coincidence only or great minds think alike..lol
If you'd like to show off your tag email me cutiepie_2468@hotmail.com I'd love to see what you've created.

Written and created by JustJo63 6th May 2009

Monday, May 4, 2009

Sweet Chocolate~FTU


For this tutorial you will need a working knowledge of PSP. I use PSP 9.

Supplies: A yummy looking scrapkit from Caitlin called Chocolate Box which can be found here
Thank you for sharing!
Tube of Choice: I am using tubes from PINUPTOONS which you will need a licence
to use. Those tubes are sold here
Template: A snazzy template from Chica #12 which you will find here
Mask of Choice or zuzzana mask 67 which you can find here
Thank you all for sharing your talent with us!
Font of Choice: Quigley Wiggly

Open your template in PSP. Make a duplicate and close the original. Delete the copyright layer.
Now go to image and canvas size - resize 650x50 white or depending on your forum you may choose to x out the background and we will resize later.
Choose a paper, I used paper 2 and copy and paste that as a new layer.
Go to Layers-Load/Save Mask-load mask from disk, choose your mask, or the one I used.
Merge group.

On each layer copy and paste papers of choice and the easiest way on each layer I find is to select all-float-defloat-invert delete and delete the original layer. I also used papers for the borders. Drop shadow as you wish.
Add your tubes and drop shadow. Add any elements of choice and I also added some doodles on top of the mask layer but under the template. With the wordart I just changed the colours to match.

I now resized my tag to make it a little bit smaller and then added copyrights. Add your name and x out the background if you wish
and save as a PNG or a JPEG and you are done!!

Thank you for trying out my tut any similiarities to any other tuts is by coincidence only or great minds think alike..lol
If you'd like to show off your tag email me cutiepie_2468@hotmail.com I'd love to see what you've created.

Written and created by JustJo63 1 May 2009

Gorjuss Roses~FTU


For this tutorial you will need a working knowledge of PSP. I use PSP 9. This is a very quick and easy tut!

Supplies: I have used Monicas scrapkit again called Lilac Dreams! It's got so many tags in it..lol
here
Thank you for sharing!
Tube of Choice: I am using a gorjuss tube from Suzanne Woolcott which you will need a licence to use. Those tubes are sold here

Mask of Choice or zuzzana heart mask which you can find here
Thank you all for sharing your talent with us!
Font of Choice: Segoe Script

Now before we start remember that this tut is only a guide, your imagination and talent will make this tag your own!

Open a New Layer 650x650 and copy and paste a paper of choice, I used paper 15

Go to Layers-Load/Save Mask-load mask from disk, choose your mask.
Merge group.


Copy and paste a frame of choice, I used heart frame 2 and add a drop shadow. Click on the frame and use your wand and click inside
and copy and paste a paper of choice or an image of choice as I have done. Modify-expand by 8-invert-delete.
I resized one of the doodles and placed it on the image background inside the heart.Next I placed a butterfly there too.

Now add your embellishments of choice. I used a couple of roses and leaves and resized to fit on the frame and added drop shadows.
I also resized one stemmed rose small enough to fit into her hand and erased parts of the stem so it looks like she's actually
holding it. I also pasted a bow on the bottom of the heart.

I now cropped my tag to make it a little bit smaller and then added copyrights. Add your name and x out the background if you wish
and save as a PNG or a JPEG and you are done!!

Thank you for trying out my tut any similiarities to any other tuts is by coincidence only or great minds think alike..lol
If you'd like to show off your tag email me cutiepie_2468@hotmail.com I'd love to see what you've created.

Written and created by JustJo63 30th April 2009

Wednesday, April 29, 2009

Beauty~FTU


For this tutorial you will need a working knowledge of PSP. I use PSP 9.

Supplies: This wonderful scrapkit is called Springtime from Bits N Bobs and you can get it
here
Tube of Choice: I am using a gorgeous tube from Rachel Anderson which you will need a licence to use. Those tubes are sold here
Mask of Choice
Template is from Babes Designz here
Thank you all for sharing your talent with us!
Fonts of Choice:Underground and Brush Script MT

Now before we start remember that this tut is only a guide, your imagination and talent will make this tag your own!

Open your template in PSP. Make a duplicate and close the original. Delete the copyright layer.
Now go to image and canvas size - resize 650x50 white or depending on your forum you may choose to x out the background and we will resize later. Delete the copyright layer

Choose a colour or paper I used paper6 and coloured it to match the tube,then copy and paste as a new layer.
Go to Layers-Load/Save Mask-load mask from disk, choose your mask.
Merge group. Duplicate the mask layer go to the original- blur-gaussian blur-15.

On each layer copy and paste papers (I coloured these to match my tube) or flood fill with colours of choice, the easiest way on each layer I find is to select all-float-defloat-invert delete
and delete the original layer(if using papers). On each layer I used an effect from Eye Candy 4000.
Swirl-34.41-3.10-60-40.
Marble-3.71-76-4-79.
Water Drops-8.00-40-15-50-50-80.

Drop shadow as you wish.
The tube I used had two different layers so I made one smaller and clicked inside
the circle layer and inverted and deleted to fit. Then I mirrored the larger tube to sit outside.
Next I added all the embellishments coloured to suit the tube and drop shadowed everything.
I then typed the word BEAUTY in large letters under the tube layer so it looks like she's sitting on top of it. I added a drop shadow and used Eye Candy 4000 Water Drops with the same settings as before.

I now resized my tag to make it a little bit smaller and then added copyrights.
Add your name and x out the background if you wish
and save as a PNG or a JPEG and you are done!!

Thank you for trying out my tut any similiarities to any other tuts is by coincidence only or great minds think alike..lol
If you'd like to show off your tag email me cutiepie_2468@hotmail.com I'd love to see what you've created.

Written and created by JustJo63 29th April 2009

Monday, April 27, 2009

Just A Girlie Girl~FTU


For this tutorial you will need a working knowledge of PSP. I use PSP 9.

Supplies: I have used a lovely scrapkit from Sue (her first one) called Girlie here
Well done and thank you for sharing!
Tube of Choice: I am using a fabulous tube from Dominic Marco which you will need a licence
to use. Those tubes are sold here
Mask of Choice
Thank you all for sharing your talent with us!
Font of Choice: Tork

Now before we start remember that this tut is only a guide, your imagination and talent will make this tag your own!

Open a New Layer 650x650 Choose a paper, I used paper 11 and copy and paste that as a new layer.
Go to Layers-Load/Save Mask-load mask from disk, Merge group. Go to effects-eyecandy 4000-swirl.
My settings are 34.41-3.10-60-40.


Copy and paste a frame of choice, I used frame 1 and add a drop shadow. Choose a paper I used paper11 then Click on the frame and use your wand and click inside the frame modify-expand by 8-invert-delete. Move the paper under the frame.
Go to effects-eyecandy 4000-swirl.My settings are 34.41-3.10-60-40.
Now click on your frame again and use your wand and click inside the frame modify-expand by 8, paste your tube then invert and delete,drop shadow.
Use my tag as a guide to see where I placed the tube and then copy and paste your tube again, make it larger in size and place it inside the frame, get rid of any excess tag and then go to blend mode-luminance legacy-lower the opacity to 70.


Now add your embellishments of choice. Add your drop shadows.


I now cropped my tag to make it a little bit smaller and then added copyrights. Add your name and x out the background if you wish and save as a PNG or a JPEG and you are done!!

Thank you for trying out my tut any similiarities to any other tuts is by coincidence only or great minds think alike..lol
If you'd like to show off your tag email me cutiepie_2468@hotmail.com I'd love to see what you've created.

Written and created by JustJo63 27th April 2009

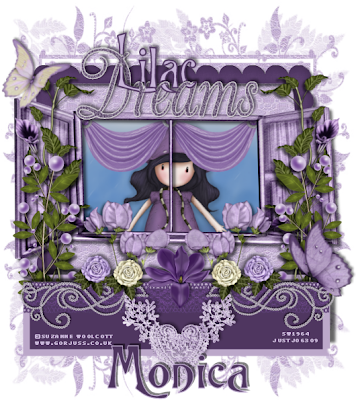
Lilac Dreams~FTU


For this tutorial you will need a working knowledge of PSP. I use PSP 9.

Supplies: I have used a gorgeous scrapkit from Monica called Lilac Dreams here
Thank you for sharing!

Tube of Choice: I am using a gorjuss tube from Suzanne Woolcott which you will need a licence
to use. Those tubes are sold here

Mask of Choice or zuzzana mask 7 which you can find here
Thank you all for sharing your talent with us!
Font of Choice: Trinigan FG

Now before we start remember that this tut is only a guide, your imagination and talent will make this tag your own!

Open a New Layer 650x650 and copy and paste a paper of choice,
I used paper 5 Go to Layers-Load/Save Mask-load mask from disk, choose your mask.
Merge group.


Copy and paste a window of choice, I used window 2 and add a drop shadow. Click on the window and use your wand and click inside each frame and copy and paste a paper of choice or an image of choice as I have done. Modify-expand by 8-invert-delete.


Now have some fun adding your embellishments of choice. I used lots of different flowers and resized to fit in front of the window on the sides and added drop shadows. I then went to my rectangle tool and made a sort of flower box. I duplicated this and put the duplicate behind the flowers and added drop shadows to each rectangle/flower box. On the original rectangle/flower box I resized bling doodle 1 and rotated it 90 degrees added a drop shadow and then duplicated it and mirrored it. I also added lace heart 2 and resized that and put it in between the 2 bling doodles. Next I copied and pasted a couple more flowers. On the top of the window I added the wordart Dreams and then typed out the word Lilac on top, erased parts and made it look like it was entwined with the wordart, add drop shadows.


I now cropped my tag to make it a little bit smaller and then added copyrights. Add your name and x out the background if you wish
and save as a PNG or a JPEG and you are done!!

Thank you for trying out my tut any similiarities to any other tuts is by coincidence only or great minds think alike..lol
If you'd like to show off your tag email me cutiepie_2468@hotmail.com I'd love to see what you've created.

Written and created by JustJo63 26th April 2009

Sunday, April 26, 2009

I Have Attitude~FTU


For this tutorial you will need a working knowledge of PSP. I use PSP 9.

Supplies: I have used a great looking scrapkit from Paula and Krissy called Sisters With Attitude here
Thank you for sharing!
Tube of Choice: I am using a gorgeous tube from Dominic Marco which you will need a licence to use. Those tubes are sold here
Mask of Choice
Thank you all for sharing your talent with us!
Fonts of Choice: Ravie and Viner Hand ITC

I forgot to mention in my other tuts that if you click on the tag it will give you a larger view of it!

Now before we start remember that this tut is only a guide, your imagination and talent will make this tag your own!

Open a New Layer 700x400 and copy and paste a paper of choice,
I used paper 1
Go to Layers-Load/Save Mask-load mask from disk, choose your mask.
Merge group.
I also added a jewel swirl-drop shadow, move around to your liking under the mask layer and then duplicate-mirror-flip.

Copy and paste a frame of choice, I used frame 3. Click on the frame and use your wand and click inside each frame and copy and paste
a paper of choice. I used paper 3 and rotated it 90 degrees. Modify-expand by 8-invert-delete. Next I went to plugins-eyecandy 4000-weave-9.30-3.10-50-50-3.41-fill with solid colour.
Click inside your frame again with the wand and add your tube-invert delete add a drop shadow.

I then added tab 2 and typed out my little saying "Don't Let My Smile Fool You" convert to a raster layer-drop shadow.
In the middle of the frame I typed in I HAVE convert to a raster layer-drop shadow and then I added the attitude buckle and drop shadow.

I now resized my tag to make it a little bit smaller and then added copyrights. Add your name and x out the background if you wish
and save as a PNG or a JPEG and you are done!!

Thank you for trying out my tut any similiarities to any other tuts is by coincidence only or great minds think alike..lol
If you'd like to show off your tag email me cutiepie_2468@hotmail.com I'd love to see what you've created.

Written and created by JustJo63 23rd April 2009

Friday, April 24, 2009

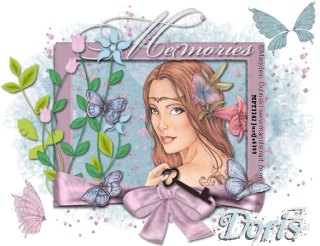
Memories~FTU


For this tutorial you will need a working knowledge of PSP. I use PSP 9.

Supplies: I have used a stunning scrapkit~Mothers Day Memories from Doris here
Thank you for so many wonderful shares!
Tube of Choice: I am using a beautiful tube from Marjolein Gulinski which you will need a licence to use. Those tubes are sold here
Mask of Choice: is WSL Mask 4 which you can find here
Thank you all for sharing your talent with us!
Font of Choice:Beyond Wonderland

Now before we start remember that this tut is only a guide, your imagination and talent will make this tag your own!

Open a New Layer 650x50 white or depending on your forum you may choose to x out the background and we will resize later.
Choose a paper, I used paper 1 and copy and paste that as a new layer.
Go to Layers-Load/Save Mask-load mask from disk, choose your mask, or the one I used.
Merge group. Duplicate the mask layer and mirror and flip, move it around so it covers most of the background layer.

Next add the glitter w sparkles. Add your drop shadow then duplicate it a few times and move it around so it looks like it's scattered over the background.

I then added Vintage frame 2. With your tube of choice copy and paste. Now click inside your frame,
modify-expand by 6 Invert and then hit delete and make sure you are on the tube layer when you do this.
Move your tube below the frame layer. Add a drop shadow to the frame and the tube.

Add your foliage, resize and add your drop shadows.I then added the bow wrap and resized it and added a drop shadow.
Add butterflies and move to your own liking or add any other embellishments. I also added the wordart Memories and added a
drop shadow and moved it under the foliage but on top of the frame. I also added the key and made it look as if she was holding it by erasing certain parts of it.

I now resized my tag to make it a little bit smaller and then added copyrights. Add your name and x out the background if you wish and save as a PNG or a JPEG and you are done!!

Thank you for trying out my tut any similiarities to any other tuts is by coincidence only or great minds think alike..lol
If you'd like to show off your tag email me cutiepie_2468@hotmail.com I'd love to see what you've created.

Written and created by JustJo63 22nd April 2009

Saturday, April 18, 2009

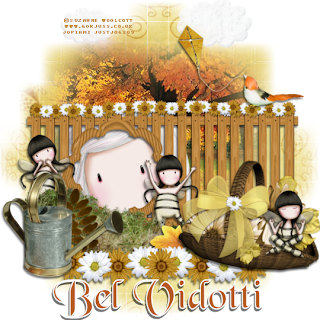
Fairies At The Bottom Of My Garden~FTU


For this tutorial you will need a working knowledge of PSP. I use PSP 9.

Supplies: I have used a gorgeous scrapkit from Bel Vidotti here
Thank you for so many wonderful shares!
Tube of Choice: I am using a few gorjuss tubes from Suzanne Woolcott which you will need a licence to use. Those tubes are sold
here
Mask of Choice: I am using zuzzana mask07. You can download that mask here
Thank you all for sharing your talent with us!
Fonts of Choice: Black Chancery and Pixelette

Now before we start remember that this tut is only a guide, your imagination and talent will make this tag your own!

Open a New Layer 700x700 white or depending on your forum you may choose to x out the background and we will resize later.
Choose a paper, I used paper 6 and copy and paste that as a new layer.Resize it and then add your mask.
Go to Layers-Load/Save Mask-load mask from disk, choose your mask, or the zuzzana mask I chose. Merge group.

I added a background with trees etc. that's been misted, you can add whatever you wish. I also added the clouds and resized. Next I added the fence and resized it and behind the fence I added my first tube which is a little girl from Gorjuss and it looks like she's peeking through the fence.
I added the little bird and the kite and it looks like he's flying it..lol.

Then I added a few more embellishments, flowers, grass, basket, watering can etc. all resized to create a scene. Next add your drop shadows.

I now resize my tag to about 540x540 and then add copyrights. Add your name and x out the background if you wish and save as a PNG or a JPEG and you are done!!

Thank you for trying out my tut any similiarities to any other tuts is by coincidence only or great minds think alike..lol
If you'd like to show off your tag email me cutiepie_2468@hotmail.com I'd love to see what you've created.

Written and created by JustJo63 17th April 2009

Thursday, April 16, 2009

The Eyes Have It~FTU


For this tutorial you will need a working knowledge of PSP. I use PSP 9.

Supplies: I have used a gorgeous scrapkit from Juicy Bits here
Thank you for so many wonderful shares!
Tube of Choice: I am using a beautiful tube from Jennifer Janesko which you will need a licence to use. Those tubes are sold here
Mask of Choice: I am using one of the many I've collected over the years. If you recognise it please let me know so I can give proper credit for it.
Thank you all for sharing your talent with us!
Fonts of Choice: Plantagenet Cherokee and Pixelette

Now before we start remember that this tut is only a guide, your imagination and talent will make this tag your own!

Open a New Layer 650x650 white or depending on your forum you may choose to x out the background and we will resize later.
Choose a paper, I used paper 5 and copy and paste that as a new layer.
Go to Layers-Load/Save Mask-load mask from disk, choose your mask, preferably something like a sun. Merge group. Duplicate the mask layer and on the original go to effects-eyecandy4000-swirl-34.41-3.10-60-40-Random Seed-1.
Now rotate this copy 45 degrees right. Add a drop shadow to both layers.

I then added frame 9. With your tube of choice copy and paste. Now click inside your frame,
modify-expand by 8 Invert and then hit delete and make sure you are on the tube layer when you do this. Move your tubes below the frame layer.
Duplicate the frame and on the original repeat what you did to the mask layer with swirl. Add a drop shadow to both layers.

I now resize my tag to about 585x585 and then add copyrights. Add your name and x out the background if you wish and save as a PNG or a JPEG and you are done!!

Thank you for trying out my tut any similiarities to any other tuts is by coincidence only or great minds think alike..lol
If you'd like to show off your tag email me cutiepie_2468@hotmail.com I'd love to see what you've created.

Written and created by JustJo63 15th April 2009

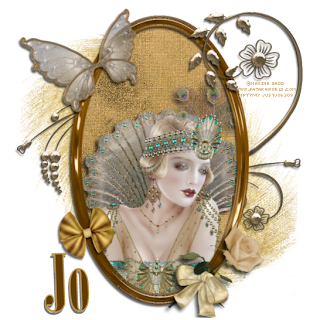
Nostalgic~FTU


For this tutorial you will need a working knowledge of PSP. I use PSP 9.

Supplies: I have used a stunning scrapkit from Doris here
Thank you for so many wonderful shares!
Tube of Choice: I am using a beautiful tube from Maxine Gadd which you will need a licence to use. Those tubes are sold here
Mask of Choice: I am using one of the many I've collected over the years. If you recognise it please let me know so I can give proper credit for it.
Thank you all for sharing your talent with us!
Fonts of Choice: Onyx and Pixelette

Now before we start remember that this tut is only a guide, your imagination and talent will make this tag your own!

Open a New Layer 650x650 white or depending on your forum you may choose to x out the background and we will resize later.
Choose a paper, I used paper 6 and copy and paste that as a new layer.
Go to Layers-Load/Save Mask-load mask from disk, choose your mask, preferably something like a swirl. Merge group.

I then added frame 3. With your tube of choice copy and paste. Now click inside your frame,
modify-expand by 6 Invert and then hit delete and make sure you are on the tube layer when you do this.
Move your tubes below the frame layer. Add a drop shadow to the frame.

Add your embellishments of choice and add your drop shadows. I also added a doodle underneath the frame and then on top and I erased most of it, so it looks like it's overlapping the frame.

I now resize my tag to about 585x585 and then add copyrights. Add your name and x out the background if you wish and save as a PNG or a JPEG and you are done!!

Thank you for trying out my tut any similiarities to any other tuts is by coincidence only or great minds think alike..lol
If you'd like to show off your tag email me cutiepie_2468@hotmail.com I'd love to see what you've created.

Written and created by JustJo63 15th April 2009

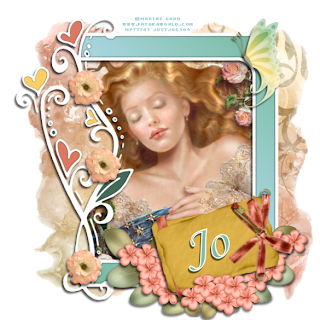
While Beauty Sleeps~FTU


For this tutorial you will need a working knowledge of PSP. I use PSP 9.

Supplies: I have used a gorgeous scrapkit from Juicy Bits here
Thank you for so many wonderful shares!
Tube of Choice: I am using a beautiful tube from Maxine Gadd which you will need a licence to use. Those tubes are sold here

Mask of Choice: I am using one of the many I've collected over the years. If you recognise it please let me know so I can give proper credit for it.
Thank you all for sharing your talent with us!
Fonts of Choice: Monotype Corsiva and Pixelette

Now before we start remember that this tut is only a guide, your imagination and talent will make this tag your own!

Open a New Layer 650x650 white or depending on your forum you may choose to x out the background and we will resize later.
Choose a paper, I used paper 9 and copy and paste that as a new layer.
Go to Layers-Load/Save Mask-load mask from disk, choose your mask.

I then added frame 4. With your tube of choice copy and paste. Now click inside your frame,
modify-expand by 8 Invert and then hit delete and make sure you are on the tube layer when you do this. Move your tube below the frame layer.

Add your embellishments of choice. I added the journal tag and mirrored it, resized it and made it look as if she was holding it by erasing certain parts.

I now resize my tag to about 585x585 and then add copyrights. Add your name and x out the background if you wish and save as a PNG or a JPEG and you are done!!

Thank you for trying out my tut any similiarities to any other tuts is by coincidence only or great minds think alike..lol
If you'd like to show off your tag email me cutiepie_2468@hotmail.com I'd love to see what you've created.

Written and created by JustJo63 15th April 2009

Facebook Fun!!

I know a lot of people aren't into Facebook and there's been some things happen with it but overall I kinda enjoy the banter and the photo's..the laughs and the comments. I really think it's a great way to keep in touch, show off your treasured photos and give support to people who need it. How difficult is it to leave a little "thinking of you today"or "goodluck" "miss you" or even "you crack me up" on someone's facebook? If you don't want to say anything you can just click on "like"and give it a thumbs up. There are also the many millions of applications you can add and send to your friends. How many Easter eggs did you all get? Oh boy do I wish they were real..I love chocolate..LOL. You can also do the trillions of quizzes on there, some are just rubbish but others are good fun. I pride myself on knowing movies and stars, so I enjoy those a lot!
It's funny to see how many friends some people have..I think my twins have over 400 friends each! That's just nuts!! No way are they all coming to their weddings..LOL.
I thought I was good hitting almost 100..I think it's 96 friends, just waiting for those 4 more now..hmmmmmmmm anyone wanna be my 100th friend?? LOL
The laugh for today is me baking brownies. Two friends from the UK want me to send them brownies and the convo's were a crackup, nothing else like it to make your day..simple enjoyable banter to put a smile on your dial!!
One of the other comments I made was about Grandmothers having the given right to make up silly songs for their grandchildren...'tis true..my mother did it and now I do. When I called my daughter Hayley today she put me on speaker phone and I sang for Aidan..he was looking at the phone she said, wondering where his Nan Nan was..LOL...well we'll be down in Tassie in 6 weeks, I can hardly wait!

My car konked out the other night in the Woolies carpark would you believe..thankfully a flat battery, not too expensive either. I think one last trip in the Tarago to Tassie and then "x"citing and delicious (the name of my car..lol) will go to greener pastures.
Anyway, that's my ramblings for today. I'm so happy you're all liking the tuts that I'm doing. I have three more to add today.

Jo x x x

Tuesday, April 14, 2009

Out Of The Shadows~FTU


For this tutorial you will need a working knowledge of PSP. I use PSP 9.

Supplies: I have used Monica's Silver Shaddow scrapkit which is beautiful and has so many possibilities for tags in it! You can find it here
Thank you for so many wonderful shares!
Tube of Choice: I am using some fabulous tubes by Ismael Rac which you will need a licence to use. Those tubes are sold here
Mask of Choice: I am using one of the fantastic masks from weescotslass here
Thank you all for sharing your talent with us!
Fonts of Choice: Scriptina and Pixelette

Now before we start remember that this tut is only a guide, your imagination and talent will make this tag your own!

Open a New Layer 650x650 white or depending on your forum you may choose to make it black and we will resize later.
Either open a new layer and use a colour of your choice or use a paper, I used paper 11 and copy and paste that as a new layer.
Go to Layers-Load/Save Mask-load mask from disk, choose your mask or use wsl mask 4.
Source luminance-fit to layer-invert transparency unticked-hide all mask-then load. Back to layers-merge-merge group.

I then added frame 3 and rotated it 45 degrees. I added the tubes and resized them slightly, duplicate and mirror. Now click inside your frame, modify-expand by 7 and move your tubes around as you want them, use my tag as a guide.Invert and then hit delete and make sure you are on the tube layer when you do this. Move your tubes below the frame layer. I also added wrap 3 and put it above the tubes and inside the frame doing the same thing. Go to your tubes and on each one hit luminance legacy. I then added 2 more duplicates of the tubes, left them above the frame and erased the parts I didn't want on the outside. Just use my tag as a guide again. I added fan 1. Underneath the mask layer I decided to add a pretty embellishment doodle 1 for effect.
On the black background it looks great! I hope I've made sense so far, I fiddle around so much on my tags, I sometimes get lost so when I write a tutorial now I try to go back and forth between writing and the tag to see what on earth I've done..LOL.
I now resize my tag to about 540x540 and then add copyrights. Add your name and x out the background if you wish and save as a PNG or a JPEG and you are done!!

Thank you for trying out my tut any similiarities to any other tuts is by coincidence only or great minds think alike..lol
If you'd like to show off your tag email me cutiepie_2468@hotmail.com I'd love to see what you've created.

Written and created by JustJo63 14th April 2009

Sunday, April 12, 2009

Eternal Friends~FTU


For this tutorial you will need a working knowledge of PSP. I use PSP 9.

Supplies: Scrapkit is called Not Sure from JT Designs, ty Jane, I'm sure it's just gorgeous!! The kit can be found here

Tube of Choice: I am using another cute tube by Suzanne Woolcott which you will need a licence to use. Her tubes are sold at Gorjuss

Masks of Choice: I am using one of the fantastic masks from Zuzzana, zuzzanna blind mask.
You can get her masks here

One from Weescotlass WSL-mask17 which you can find here
Thank you all for sharing your talent with us!
Fonts of Choice:VTKSDear Love and Pixelette

Now before we start remember that this tut is only a guide, your imagination and talent will make this tag your own!


Open a New Layer 700x700 background white or x out the background layer before you save as a PNG.
I used the quilt paper and copy and paste that as a new layer.Next I used my raster deform tool and stretched it to fit the layer.
Then I went to Eyecandy 4000-Swirl-60.62-25.50-100-60-random seed-1.
Go to Layers-Load/Save Mask-load mask from disk, choose your mask or use zuzzana blind mask.
Source luminance-fit to canvas-invert transparency unticked-hide all mask-then load. Back to layers-merge-merge group.
Lower the opacity to 72 on your mask layer.
Pick one of your butterflies and copy and paste it in the middle of your tag. Reduce the size to about 35. Now go to mura meister copies and use these settings. Encircle-circle-Tile Mode-Behind. BG Colour pale pink. 12-50-50-0-100--25-100-0-0-30-0 click OK.
Go to layers-Load/Save Mask-load mask from disk, choose your mask or use WSL-Mask 17.
Source luminance-fit to canvas-invert transparency unticked-hide all mask-then load. Back to layers-merge-merge group.
I put this layer over the mask layer and resized it to suit. Lower the opacity to 60. I also added some sparkles using constellation if you choose to do this the settings are as follows-2.00-6-8-1-100-55. Twinkle rotation 45. Keep original image. Random Seed 1.
Now paste the squiggle frame as a new layer. Choose your image or tube and paste that as a new layer. Using your raster deform make
it as big or as small to fit over the frame. Go to your magic wand, click inside the frame. Selections-modify-expand by 5-invert-delete and place your image/tube under the frame layer.I found a rainbow in my extras folder and resized it to fit inside the frame and
look like the unicorn is on it. Next I added a bow and the heart chain, add any extra's you wish. Add your drop shadows. This is where I like to resize the tag.
Add your copyrights and your name (I added a gradient glow) and save as a PNG or a JPEG...you are done!!
My other half named this tutorial for me, so thank you Mike!
Thank you for trying my tut!
Written and created by JustJo63 12th April, 2009

Blinkie's gone blankie!

Well I was sitting here adding blinkies and got some error message, now all my blinkies have gone! I'll try to get these all up again soon, I really like all the blinkies I'm collecting too.

Also I'll be adding another tut today and I'm working on a couple of others too. There are soooooo many gorgeous scrapkits out there to work with, it's hard to know where to start sometimes!

Jo x x x

A Twilight Fan~Forever!~FTU


Well I watched Twilight again last night and I just finished the 4th book, so that inspired me to write a tut dedicated to
Twilight. I also gave in and bought some new tubes from Suzanne Woolcott, who can resist, especially when there's a sale..lol.

Supplies: I have used a cluster frame from here . This blog is in french so all you do is
go down the page and you will see Cherry Brown, which is a scrapkit, underneath that is the cluster frames and the download for them is entitled Par ici. Thank you for these wonderful shares.
I tried to leave a thank you but for some reason the comment didn't work. I have grabbed the blinkie for display here on my blog.
I am using a very sweet tube from Suzanne Woolcott www.gorjuss.co.uk
My mask is from Zuzzana here. zuzzana-heart-mask. Thanks sweetie.
Fonts of choice: aka Frivolity, Alan Den and Pixelette.

Open a new layer 650x650 white or depending on your forum you may choose to x out the background or make it black.
I will resize mine later.
New layer and flood fill with colour of choice, I made mine a brownish/black colour to match the frame I'm using.
Go to Layers-Load/Save Mask-load mask from disk, choose your mask or use the one I used.
Source luminance-fit to layer-invert transparency ticked-hide all mask-then load. Back to layers-merge-merge group.
Resize the mask layer slightly and rotate it left 17.00.
Add your frame and resize. Get your selection tool and click on rectangle and go to your frame and click on it so it is slightly bigger than the frame. Go to your tube and copy and paste it into the frame. I've used one with a background, if you wish to choose a background first then a tube go ahead and do that now.
Go to selections-invert and then hit delete and make sure you are on the tube layer when you do this.
Repeat all of that if you do choose your own background.
Add your dropshadows and then merge the tube/background and frame layers.
Rotate left 17.00.
I resized everything so it fitted in together, just use your own judgement.
Add your copyright once you're satisfied with everything. Add the saying I've got (I added gradient glow white to mine) or your own and add your name.
Save as a png or jpeg and your tag is done!
Thank you for trying my tut!
Written and created by JustJo63 12th April, 2009