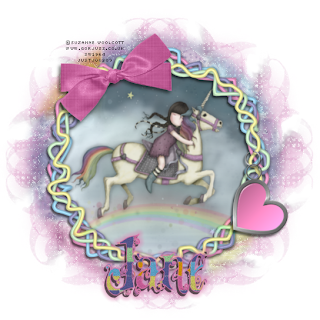
For this tutorial you will need a working knowledge of PSP. I use PSP 9.
Supplies: Scrapkit is called Not Sure from JT Designs, ty Jane, I'm sure it's just gorgeous!! The kit can be found here
Tube of Choice: I am using another cute tube by Suzanne Woolcott which you will need a licence to use. Her tubes are sold at Gorjuss
Masks of Choice: I am using one of the fantastic masks from Zuzzana, zuzzanna blind mask.
You can get her masks here
One from Weescotlass WSL-mask17 which you can find here
Thank you all for sharing your talent with us!
Fonts of Choice:VTKSDear Love and Pixelette
Now before we start remember that this tut is only a guide, your imagination and talent will make this tag your own!
Open a New Layer 700x700 background white or x out the background layer before you save as a PNG.
I used the quilt paper and copy and paste that as a new layer.Next I used my raster deform tool and stretched it to fit the layer.
Then I went to Eyecandy 4000-Swirl-60.62-25.50-100-60-random seed-1.
Go to Layers-Load/Save Mask-load mask from disk, choose your mask or use zuzzana blind mask.
Source luminance-fit to canvas-invert transparency unticked-hide all mask-then load. Back to layers-merge-merge group.
Lower the opacity to 72 on your mask layer.
Pick one of your butterflies and copy and paste it in the middle of your tag. Reduce the size to about 35. Now go to mura meister copies and use these settings. Encircle-circle-Tile Mode-Behind. BG Colour pale pink. 12-50-50-0-100--25-100-0-0-30-0 click OK.
Go to layers-Load/Save Mask-load mask from disk, choose your mask or use WSL-Mask 17.
Source luminance-fit to canvas-invert transparency unticked-hide all mask-then load. Back to layers-merge-merge group.
I put this layer over the mask layer and resized it to suit. Lower the opacity to 60. I also added some sparkles using constellation if you choose to do this the settings are as follows-2.00-6-8-1-100-55. Twinkle rotation 45. Keep original image. Random Seed 1.
Now paste the squiggle frame as a new layer. Choose your image or tube and paste that as a new layer. Using your raster deform make
it as big or as small to fit over the frame. Go to your magic wand, click inside the frame. Selections-modify-expand by 5-invert-delete and place your image/tube under the frame layer.I found a rainbow in my extras folder and resized it to fit inside the frame and
look like the unicorn is on it. Next I added a bow and the heart chain, add any extra's you wish. Add your drop shadows. This is where I like to resize the tag.
Add your copyrights and your name (I added a gradient glow) and save as a PNG or a JPEG...you are done!!
My other half named this tutorial for me, so thank you Mike!
Thank you for trying my tut!
Written and created by JustJo63 12th April, 2009


No comments:
Post a Comment