Wednesday, April 29, 2009

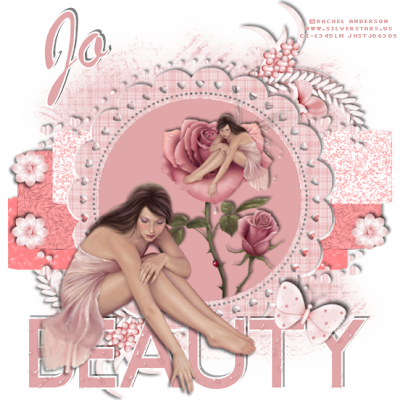
Beauty~FTU


For this tutorial you will need a working knowledge of PSP. I use PSP 9.

Supplies: This wonderful scrapkit is called Springtime from Bits N Bobs and you can get it
here
Tube of Choice: I am using a gorgeous tube from Rachel Anderson which you will need a licence to use. Those tubes are sold here
Mask of Choice
Template is from Babes Designz here
Thank you all for sharing your talent with us!
Fonts of Choice:Underground and Brush Script MT

Now before we start remember that this tut is only a guide, your imagination and talent will make this tag your own!

Open your template in PSP. Make a duplicate and close the original. Delete the copyright layer.
Now go to image and canvas size - resize 650x50 white or depending on your forum you may choose to x out the background and we will resize later. Delete the copyright layer

Choose a colour or paper I used paper6 and coloured it to match the tube,then copy and paste as a new layer.
Go to Layers-Load/Save Mask-load mask from disk, choose your mask.
Merge group. Duplicate the mask layer go to the original- blur-gaussian blur-15.

On each layer copy and paste papers (I coloured these to match my tube) or flood fill with colours of choice, the easiest way on each layer I find is to select all-float-defloat-invert delete
and delete the original layer(if using papers). On each layer I used an effect from Eye Candy 4000.
Swirl-34.41-3.10-60-40.
Marble-3.71-76-4-79.
Water Drops-8.00-40-15-50-50-80.

Drop shadow as you wish.
The tube I used had two different layers so I made one smaller and clicked inside
the circle layer and inverted and deleted to fit. Then I mirrored the larger tube to sit outside.
Next I added all the embellishments coloured to suit the tube and drop shadowed everything.
I then typed the word BEAUTY in large letters under the tube layer so it looks like she's sitting on top of it. I added a drop shadow and used Eye Candy 4000 Water Drops with the same settings as before.

I now resized my tag to make it a little bit smaller and then added copyrights.
Add your name and x out the background if you wish
and save as a PNG or a JPEG and you are done!!

Thank you for trying out my tut any similiarities to any other tuts is by coincidence only or great minds think alike..lol
If you'd like to show off your tag email me cutiepie_2468@hotmail.com I'd love to see what you've created.

Written and created by JustJo63 29th April 2009

Monday, April 27, 2009

Just A Girlie Girl~FTU


For this tutorial you will need a working knowledge of PSP. I use PSP 9.

Supplies: I have used a lovely scrapkit from Sue (her first one) called Girlie here
Well done and thank you for sharing!
Tube of Choice: I am using a fabulous tube from Dominic Marco which you will need a licence
to use. Those tubes are sold here
Mask of Choice
Thank you all for sharing your talent with us!
Font of Choice: Tork

Now before we start remember that this tut is only a guide, your imagination and talent will make this tag your own!

Open a New Layer 650x650 Choose a paper, I used paper 11 and copy and paste that as a new layer.
Go to Layers-Load/Save Mask-load mask from disk, Merge group. Go to effects-eyecandy 4000-swirl.
My settings are 34.41-3.10-60-40.


Copy and paste a frame of choice, I used frame 1 and add a drop shadow. Choose a paper I used paper11 then Click on the frame and use your wand and click inside the frame modify-expand by 8-invert-delete. Move the paper under the frame.
Go to effects-eyecandy 4000-swirl.My settings are 34.41-3.10-60-40.
Now click on your frame again and use your wand and click inside the frame modify-expand by 8, paste your tube then invert and delete,drop shadow.
Use my tag as a guide to see where I placed the tube and then copy and paste your tube again, make it larger in size and place it inside the frame, get rid of any excess tag and then go to blend mode-luminance legacy-lower the opacity to 70.


Now add your embellishments of choice. Add your drop shadows.


I now cropped my tag to make it a little bit smaller and then added copyrights. Add your name and x out the background if you wish and save as a PNG or a JPEG and you are done!!

Thank you for trying out my tut any similiarities to any other tuts is by coincidence only or great minds think alike..lol
If you'd like to show off your tag email me cutiepie_2468@hotmail.com I'd love to see what you've created.

Written and created by JustJo63 27th April 2009

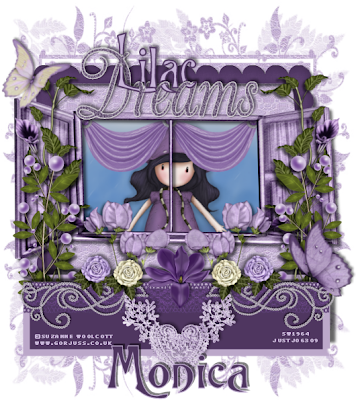
Lilac Dreams~FTU


For this tutorial you will need a working knowledge of PSP. I use PSP 9.

Supplies: I have used a gorgeous scrapkit from Monica called Lilac Dreams here
Thank you for sharing!

Tube of Choice: I am using a gorjuss tube from Suzanne Woolcott which you will need a licence
to use. Those tubes are sold here

Mask of Choice or zuzzana mask 7 which you can find here
Thank you all for sharing your talent with us!
Font of Choice: Trinigan FG

Now before we start remember that this tut is only a guide, your imagination and talent will make this tag your own!

Open a New Layer 650x650 and copy and paste a paper of choice,
I used paper 5 Go to Layers-Load/Save Mask-load mask from disk, choose your mask.
Merge group.


Copy and paste a window of choice, I used window 2 and add a drop shadow. Click on the window and use your wand and click inside each frame and copy and paste a paper of choice or an image of choice as I have done. Modify-expand by 8-invert-delete.


Now have some fun adding your embellishments of choice. I used lots of different flowers and resized to fit in front of the window on the sides and added drop shadows. I then went to my rectangle tool and made a sort of flower box. I duplicated this and put the duplicate behind the flowers and added drop shadows to each rectangle/flower box. On the original rectangle/flower box I resized bling doodle 1 and rotated it 90 degrees added a drop shadow and then duplicated it and mirrored it. I also added lace heart 2 and resized that and put it in between the 2 bling doodles. Next I copied and pasted a couple more flowers. On the top of the window I added the wordart Dreams and then typed out the word Lilac on top, erased parts and made it look like it was entwined with the wordart, add drop shadows.


I now cropped my tag to make it a little bit smaller and then added copyrights. Add your name and x out the background if you wish
and save as a PNG or a JPEG and you are done!!

Thank you for trying out my tut any similiarities to any other tuts is by coincidence only or great minds think alike..lol
If you'd like to show off your tag email me cutiepie_2468@hotmail.com I'd love to see what you've created.

Written and created by JustJo63 26th April 2009

Sunday, April 26, 2009

I Have Attitude~FTU


For this tutorial you will need a working knowledge of PSP. I use PSP 9.

Supplies: I have used a great looking scrapkit from Paula and Krissy called Sisters With Attitude here
Thank you for sharing!
Tube of Choice: I am using a gorgeous tube from Dominic Marco which you will need a licence to use. Those tubes are sold here
Mask of Choice
Thank you all for sharing your talent with us!
Fonts of Choice: Ravie and Viner Hand ITC

I forgot to mention in my other tuts that if you click on the tag it will give you a larger view of it!

Now before we start remember that this tut is only a guide, your imagination and talent will make this tag your own!

Open a New Layer 700x400 and copy and paste a paper of choice,
I used paper 1
Go to Layers-Load/Save Mask-load mask from disk, choose your mask.
Merge group.
I also added a jewel swirl-drop shadow, move around to your liking under the mask layer and then duplicate-mirror-flip.

Copy and paste a frame of choice, I used frame 3. Click on the frame and use your wand and click inside each frame and copy and paste
a paper of choice. I used paper 3 and rotated it 90 degrees. Modify-expand by 8-invert-delete. Next I went to plugins-eyecandy 4000-weave-9.30-3.10-50-50-3.41-fill with solid colour.
Click inside your frame again with the wand and add your tube-invert delete add a drop shadow.

I then added tab 2 and typed out my little saying "Don't Let My Smile Fool You" convert to a raster layer-drop shadow.
In the middle of the frame I typed in I HAVE convert to a raster layer-drop shadow and then I added the attitude buckle and drop shadow.

I now resized my tag to make it a little bit smaller and then added copyrights. Add your name and x out the background if you wish
and save as a PNG or a JPEG and you are done!!

Thank you for trying out my tut any similiarities to any other tuts is by coincidence only or great minds think alike..lol
If you'd like to show off your tag email me cutiepie_2468@hotmail.com I'd love to see what you've created.

Written and created by JustJo63 23rd April 2009

Friday, April 24, 2009

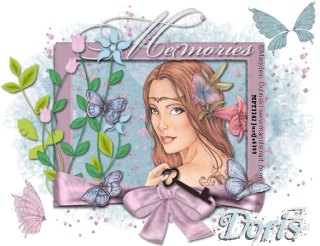
Memories~FTU


For this tutorial you will need a working knowledge of PSP. I use PSP 9.

Supplies: I have used a stunning scrapkit~Mothers Day Memories from Doris here
Thank you for so many wonderful shares!
Tube of Choice: I am using a beautiful tube from Marjolein Gulinski which you will need a licence to use. Those tubes are sold here
Mask of Choice: is WSL Mask 4 which you can find here
Thank you all for sharing your talent with us!
Font of Choice:Beyond Wonderland

Now before we start remember that this tut is only a guide, your imagination and talent will make this tag your own!

Open a New Layer 650x50 white or depending on your forum you may choose to x out the background and we will resize later.
Choose a paper, I used paper 1 and copy and paste that as a new layer.
Go to Layers-Load/Save Mask-load mask from disk, choose your mask, or the one I used.
Merge group. Duplicate the mask layer and mirror and flip, move it around so it covers most of the background layer.

Next add the glitter w sparkles. Add your drop shadow then duplicate it a few times and move it around so it looks like it's scattered over the background.

I then added Vintage frame 2. With your tube of choice copy and paste. Now click inside your frame,
modify-expand by 6 Invert and then hit delete and make sure you are on the tube layer when you do this.
Move your tube below the frame layer. Add a drop shadow to the frame and the tube.

Add your foliage, resize and add your drop shadows.I then added the bow wrap and resized it and added a drop shadow.
Add butterflies and move to your own liking or add any other embellishments. I also added the wordart Memories and added a
drop shadow and moved it under the foliage but on top of the frame. I also added the key and made it look as if she was holding it by erasing certain parts of it.

I now resized my tag to make it a little bit smaller and then added copyrights. Add your name and x out the background if you wish and save as a PNG or a JPEG and you are done!!

Thank you for trying out my tut any similiarities to any other tuts is by coincidence only or great minds think alike..lol
If you'd like to show off your tag email me cutiepie_2468@hotmail.com I'd love to see what you've created.

Written and created by JustJo63 22nd April 2009

Saturday, April 18, 2009

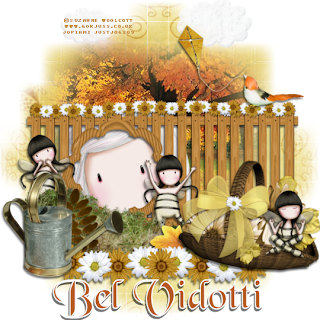
Fairies At The Bottom Of My Garden~FTU


For this tutorial you will need a working knowledge of PSP. I use PSP 9.

Supplies: I have used a gorgeous scrapkit from Bel Vidotti here
Thank you for so many wonderful shares!
Tube of Choice: I am using a few gorjuss tubes from Suzanne Woolcott which you will need a licence to use. Those tubes are sold
here
Mask of Choice: I am using zuzzana mask07. You can download that mask here
Thank you all for sharing your talent with us!
Fonts of Choice: Black Chancery and Pixelette

Now before we start remember that this tut is only a guide, your imagination and talent will make this tag your own!

Open a New Layer 700x700 white or depending on your forum you may choose to x out the background and we will resize later.
Choose a paper, I used paper 6 and copy and paste that as a new layer.Resize it and then add your mask.
Go to Layers-Load/Save Mask-load mask from disk, choose your mask, or the zuzzana mask I chose. Merge group.

I added a background with trees etc. that's been misted, you can add whatever you wish. I also added the clouds and resized. Next I added the fence and resized it and behind the fence I added my first tube which is a little girl from Gorjuss and it looks like she's peeking through the fence.
I added the little bird and the kite and it looks like he's flying it..lol.

Then I added a few more embellishments, flowers, grass, basket, watering can etc. all resized to create a scene. Next add your drop shadows.

I now resize my tag to about 540x540 and then add copyrights. Add your name and x out the background if you wish and save as a PNG or a JPEG and you are done!!

Thank you for trying out my tut any similiarities to any other tuts is by coincidence only or great minds think alike..lol
If you'd like to show off your tag email me cutiepie_2468@hotmail.com I'd love to see what you've created.

Written and created by JustJo63 17th April 2009

Thursday, April 16, 2009

The Eyes Have It~FTU


For this tutorial you will need a working knowledge of PSP. I use PSP 9.

Supplies: I have used a gorgeous scrapkit from Juicy Bits here
Thank you for so many wonderful shares!
Tube of Choice: I am using a beautiful tube from Jennifer Janesko which you will need a licence to use. Those tubes are sold here
Mask of Choice: I am using one of the many I've collected over the years. If you recognise it please let me know so I can give proper credit for it.
Thank you all for sharing your talent with us!
Fonts of Choice: Plantagenet Cherokee and Pixelette

Now before we start remember that this tut is only a guide, your imagination and talent will make this tag your own!

Open a New Layer 650x650 white or depending on your forum you may choose to x out the background and we will resize later.
Choose a paper, I used paper 5 and copy and paste that as a new layer.
Go to Layers-Load/Save Mask-load mask from disk, choose your mask, preferably something like a sun. Merge group. Duplicate the mask layer and on the original go to effects-eyecandy4000-swirl-34.41-3.10-60-40-Random Seed-1.
Now rotate this copy 45 degrees right. Add a drop shadow to both layers.

I then added frame 9. With your tube of choice copy and paste. Now click inside your frame,
modify-expand by 8 Invert and then hit delete and make sure you are on the tube layer when you do this. Move your tubes below the frame layer.
Duplicate the frame and on the original repeat what you did to the mask layer with swirl. Add a drop shadow to both layers.

I now resize my tag to about 585x585 and then add copyrights. Add your name and x out the background if you wish and save as a PNG or a JPEG and you are done!!

Thank you for trying out my tut any similiarities to any other tuts is by coincidence only or great minds think alike..lol
If you'd like to show off your tag email me cutiepie_2468@hotmail.com I'd love to see what you've created.

Written and created by JustJo63 15th April 2009

Nostalgic~FTU


For this tutorial you will need a working knowledge of PSP. I use PSP 9.

Supplies: I have used a stunning scrapkit from Doris here
Thank you for so many wonderful shares!
Tube of Choice: I am using a beautiful tube from Maxine Gadd which you will need a licence to use. Those tubes are sold here
Mask of Choice: I am using one of the many I've collected over the years. If you recognise it please let me know so I can give proper credit for it.
Thank you all for sharing your talent with us!
Fonts of Choice: Onyx and Pixelette

Now before we start remember that this tut is only a guide, your imagination and talent will make this tag your own!

Open a New Layer 650x650 white or depending on your forum you may choose to x out the background and we will resize later.
Choose a paper, I used paper 6 and copy and paste that as a new layer.
Go to Layers-Load/Save Mask-load mask from disk, choose your mask, preferably something like a swirl. Merge group.

I then added frame 3. With your tube of choice copy and paste. Now click inside your frame,
modify-expand by 6 Invert and then hit delete and make sure you are on the tube layer when you do this.
Move your tubes below the frame layer. Add a drop shadow to the frame.

Add your embellishments of choice and add your drop shadows. I also added a doodle underneath the frame and then on top and I erased most of it, so it looks like it's overlapping the frame.

I now resize my tag to about 585x585 and then add copyrights. Add your name and x out the background if you wish and save as a PNG or a JPEG and you are done!!

Thank you for trying out my tut any similiarities to any other tuts is by coincidence only or great minds think alike..lol
If you'd like to show off your tag email me cutiepie_2468@hotmail.com I'd love to see what you've created.

Written and created by JustJo63 15th April 2009

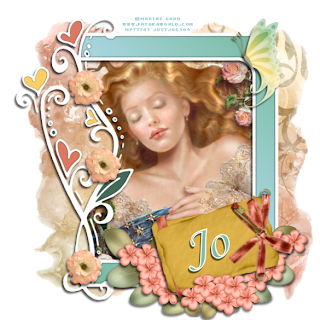
While Beauty Sleeps~FTU


For this tutorial you will need a working knowledge of PSP. I use PSP 9.

Supplies: I have used a gorgeous scrapkit from Juicy Bits here
Thank you for so many wonderful shares!
Tube of Choice: I am using a beautiful tube from Maxine Gadd which you will need a licence to use. Those tubes are sold here

Mask of Choice: I am using one of the many I've collected over the years. If you recognise it please let me know so I can give proper credit for it.
Thank you all for sharing your talent with us!
Fonts of Choice: Monotype Corsiva and Pixelette

Now before we start remember that this tut is only a guide, your imagination and talent will make this tag your own!

Open a New Layer 650x650 white or depending on your forum you may choose to x out the background and we will resize later.
Choose a paper, I used paper 9 and copy and paste that as a new layer.
Go to Layers-Load/Save Mask-load mask from disk, choose your mask.

I then added frame 4. With your tube of choice copy and paste. Now click inside your frame,
modify-expand by 8 Invert and then hit delete and make sure you are on the tube layer when you do this. Move your tube below the frame layer.

Add your embellishments of choice. I added the journal tag and mirrored it, resized it and made it look as if she was holding it by erasing certain parts.

I now resize my tag to about 585x585 and then add copyrights. Add your name and x out the background if you wish and save as a PNG or a JPEG and you are done!!

Thank you for trying out my tut any similiarities to any other tuts is by coincidence only or great minds think alike..lol
If you'd like to show off your tag email me cutiepie_2468@hotmail.com I'd love to see what you've created.

Written and created by JustJo63 15th April 2009

Facebook Fun!!

I know a lot of people aren't into Facebook and there's been some things happen with it but overall I kinda enjoy the banter and the photo's..the laughs and the comments. I really think it's a great way to keep in touch, show off your treasured photos and give support to people who need it. How difficult is it to leave a little "thinking of you today"or "goodluck" "miss you" or even "you crack me up" on someone's facebook? If you don't want to say anything you can just click on "like"and give it a thumbs up. There are also the many millions of applications you can add and send to your friends. How many Easter eggs did you all get? Oh boy do I wish they were real..I love chocolate..LOL. You can also do the trillions of quizzes on there, some are just rubbish but others are good fun. I pride myself on knowing movies and stars, so I enjoy those a lot!
It's funny to see how many friends some people have..I think my twins have over 400 friends each! That's just nuts!! No way are they all coming to their weddings..LOL.
I thought I was good hitting almost 100..I think it's 96 friends, just waiting for those 4 more now..hmmmmmmmm anyone wanna be my 100th friend?? LOL
The laugh for today is me baking brownies. Two friends from the UK want me to send them brownies and the convo's were a crackup, nothing else like it to make your day..simple enjoyable banter to put a smile on your dial!!
One of the other comments I made was about Grandmothers having the given right to make up silly songs for their grandchildren...'tis true..my mother did it and now I do. When I called my daughter Hayley today she put me on speaker phone and I sang for Aidan..he was looking at the phone she said, wondering where his Nan Nan was..LOL...well we'll be down in Tassie in 6 weeks, I can hardly wait!

My car konked out the other night in the Woolies carpark would you believe..thankfully a flat battery, not too expensive either. I think one last trip in the Tarago to Tassie and then "x"citing and delicious (the name of my car..lol) will go to greener pastures.
Anyway, that's my ramblings for today. I'm so happy you're all liking the tuts that I'm doing. I have three more to add today.

Jo x x x

Tuesday, April 14, 2009

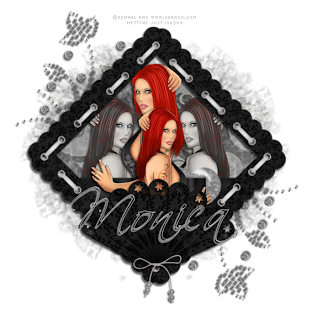
Out Of The Shadows~FTU


For this tutorial you will need a working knowledge of PSP. I use PSP 9.

Supplies: I have used Monica's Silver Shaddow scrapkit which is beautiful and has so many possibilities for tags in it! You can find it here
Thank you for so many wonderful shares!
Tube of Choice: I am using some fabulous tubes by Ismael Rac which you will need a licence to use. Those tubes are sold here
Mask of Choice: I am using one of the fantastic masks from weescotslass here
Thank you all for sharing your talent with us!
Fonts of Choice: Scriptina and Pixelette

Now before we start remember that this tut is only a guide, your imagination and talent will make this tag your own!

Open a New Layer 650x650 white or depending on your forum you may choose to make it black and we will resize later.
Either open a new layer and use a colour of your choice or use a paper, I used paper 11 and copy and paste that as a new layer.
Go to Layers-Load/Save Mask-load mask from disk, choose your mask or use wsl mask 4.
Source luminance-fit to layer-invert transparency unticked-hide all mask-then load. Back to layers-merge-merge group.

I then added frame 3 and rotated it 45 degrees. I added the tubes and resized them slightly, duplicate and mirror. Now click inside your frame, modify-expand by 7 and move your tubes around as you want them, use my tag as a guide.Invert and then hit delete and make sure you are on the tube layer when you do this. Move your tubes below the frame layer. I also added wrap 3 and put it above the tubes and inside the frame doing the same thing. Go to your tubes and on each one hit luminance legacy. I then added 2 more duplicates of the tubes, left them above the frame and erased the parts I didn't want on the outside. Just use my tag as a guide again. I added fan 1. Underneath the mask layer I decided to add a pretty embellishment doodle 1 for effect.
On the black background it looks great! I hope I've made sense so far, I fiddle around so much on my tags, I sometimes get lost so when I write a tutorial now I try to go back and forth between writing and the tag to see what on earth I've done..LOL.
I now resize my tag to about 540x540 and then add copyrights. Add your name and x out the background if you wish and save as a PNG or a JPEG and you are done!!

Thank you for trying out my tut any similiarities to any other tuts is by coincidence only or great minds think alike..lol
If you'd like to show off your tag email me cutiepie_2468@hotmail.com I'd love to see what you've created.

Written and created by JustJo63 14th April 2009

Sunday, April 12, 2009

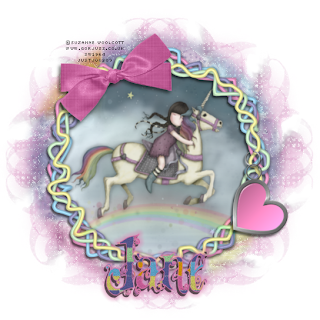
Eternal Friends~FTU


For this tutorial you will need a working knowledge of PSP. I use PSP 9.

Supplies: Scrapkit is called Not Sure from JT Designs, ty Jane, I'm sure it's just gorgeous!! The kit can be found here

Tube of Choice: I am using another cute tube by Suzanne Woolcott which you will need a licence to use. Her tubes are sold at Gorjuss

Masks of Choice: I am using one of the fantastic masks from Zuzzana, zuzzanna blind mask.
You can get her masks here

One from Weescotlass WSL-mask17 which you can find here
Thank you all for sharing your talent with us!
Fonts of Choice:VTKSDear Love and Pixelette

Now before we start remember that this tut is only a guide, your imagination and talent will make this tag your own!


Open a New Layer 700x700 background white or x out the background layer before you save as a PNG.
I used the quilt paper and copy and paste that as a new layer.Next I used my raster deform tool and stretched it to fit the layer.
Then I went to Eyecandy 4000-Swirl-60.62-25.50-100-60-random seed-1.
Go to Layers-Load/Save Mask-load mask from disk, choose your mask or use zuzzana blind mask.
Source luminance-fit to canvas-invert transparency unticked-hide all mask-then load. Back to layers-merge-merge group.
Lower the opacity to 72 on your mask layer.
Pick one of your butterflies and copy and paste it in the middle of your tag. Reduce the size to about 35. Now go to mura meister copies and use these settings. Encircle-circle-Tile Mode-Behind. BG Colour pale pink. 12-50-50-0-100--25-100-0-0-30-0 click OK.
Go to layers-Load/Save Mask-load mask from disk, choose your mask or use WSL-Mask 17.
Source luminance-fit to canvas-invert transparency unticked-hide all mask-then load. Back to layers-merge-merge group.
I put this layer over the mask layer and resized it to suit. Lower the opacity to 60. I also added some sparkles using constellation if you choose to do this the settings are as follows-2.00-6-8-1-100-55. Twinkle rotation 45. Keep original image. Random Seed 1.
Now paste the squiggle frame as a new layer. Choose your image or tube and paste that as a new layer. Using your raster deform make
it as big or as small to fit over the frame. Go to your magic wand, click inside the frame. Selections-modify-expand by 5-invert-delete and place your image/tube under the frame layer.I found a rainbow in my extras folder and resized it to fit inside the frame and
look like the unicorn is on it. Next I added a bow and the heart chain, add any extra's you wish. Add your drop shadows. This is where I like to resize the tag.
Add your copyrights and your name (I added a gradient glow) and save as a PNG or a JPEG...you are done!!
My other half named this tutorial for me, so thank you Mike!
Thank you for trying my tut!
Written and created by JustJo63 12th April, 2009

Blinkie's gone blankie!

Well I was sitting here adding blinkies and got some error message, now all my blinkies have gone! I'll try to get these all up again soon, I really like all the blinkies I'm collecting too.

Also I'll be adding another tut today and I'm working on a couple of others too. There are soooooo many gorgeous scrapkits out there to work with, it's hard to know where to start sometimes!

Jo x x x

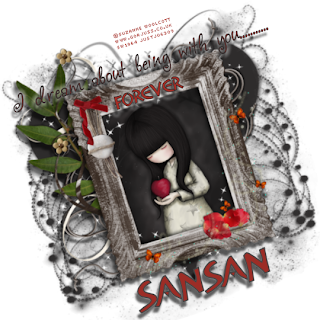
A Twilight Fan~Forever!~FTU


Well I watched Twilight again last night and I just finished the 4th book, so that inspired me to write a tut dedicated to
Twilight. I also gave in and bought some new tubes from Suzanne Woolcott, who can resist, especially when there's a sale..lol.

Supplies: I have used a cluster frame from here . This blog is in french so all you do is
go down the page and you will see Cherry Brown, which is a scrapkit, underneath that is the cluster frames and the download for them is entitled Par ici. Thank you for these wonderful shares.
I tried to leave a thank you but for some reason the comment didn't work. I have grabbed the blinkie for display here on my blog.
I am using a very sweet tube from Suzanne Woolcott www.gorjuss.co.uk
My mask is from Zuzzana here. zuzzana-heart-mask. Thanks sweetie.
Fonts of choice: aka Frivolity, Alan Den and Pixelette.

Open a new layer 650x650 white or depending on your forum you may choose to x out the background or make it black.
I will resize mine later.
New layer and flood fill with colour of choice, I made mine a brownish/black colour to match the frame I'm using.
Go to Layers-Load/Save Mask-load mask from disk, choose your mask or use the one I used.
Source luminance-fit to layer-invert transparency ticked-hide all mask-then load. Back to layers-merge-merge group.
Resize the mask layer slightly and rotate it left 17.00.
Add your frame and resize. Get your selection tool and click on rectangle and go to your frame and click on it so it is slightly bigger than the frame. Go to your tube and copy and paste it into the frame. I've used one with a background, if you wish to choose a background first then a tube go ahead and do that now.
Go to selections-invert and then hit delete and make sure you are on the tube layer when you do this.
Repeat all of that if you do choose your own background.
Add your dropshadows and then merge the tube/background and frame layers.
Rotate left 17.00.
I resized everything so it fitted in together, just use your own judgement.
Add your copyright once you're satisfied with everything. Add the saying I've got (I added gradient glow white to mine) or your own and add your name.
Save as a png or jpeg and your tag is done!
Thank you for trying my tut!
Written and created by JustJo63 12th April, 2009

What A Smile!~FTU


Supplies: I have used a cluster frame from here . This blog is in french so all you do is go down the page and you will see Cherry Brown, which is a scrapkit, underneath that is the cluster frames
and the download for them is entitled Par ici. Thank you for these wonderful shares.
I tried to leave a thank you but for some reason the comment didn't work. I have grabbed the blinkie for display here on my blog.
I am using a beautiful tube from Olivia from her Bettie Page range. You can get those tubes at CILM.
My mask is from Zuzzana here. zuzzana_mask 66. Thanks sweetie.

Open a new layer 650x400 white or depending on your forum you may choose to x out the background or make it black.
New layer and flood fill with colour of choice, I made mine a reddish colour to match the tube and frame I'm using.
Go to Layers-Load/Save Mask-load mask from disk, choose your mask or use the one I used.
Source luminance-fit to layer-invert transparency ticked-hide all mask-then load. Back to layers-merge-merge group.
Duplicate mask and on the original go to blur-gaussian blur-15
Effects-texture effects-mosaic antique-50-50-symmetric ticked-70-2-50.

Copy and paste the heart cluster frame. Rotate it 90 degrees and resize it to fit.
Copy and paste your tube. I used the raster deform tool to resize my tube to fit inside the heart.
Using your wand click inside the heart shape, it may take a bit to get the ants marching the way you want.
Go to selections-modify-expand by about 3-invert and then hit delete and make sure you are on the tube layer when you do this.
Move your tube below the cluster frame layer. I merged down the tube and frame, then duplicate, on the original go to blur-gaussian blur-15. Effects-texture effects-mosaic antique-50-50-symmetric ticked-70-2-50.

Add your copyrights and name. When I added the name I dropshadowed, then duplicated and added blur-gaussian blur-4.95 and the mosaic antique with the same setting as before, for a bit
more of an effect. This is totally optional.

Save as a png or jpeg and your tag is done!
Thank you for trying my tut!
Written and created by JustJo63 11th April, 2009

Falling Into Love~FTU


For this tutorial you will need a working knowledge of PSP. I use PSP 9.

Supplies: I have used a beautiful scrapkit from Jaelop Designs called Romantic, you can find that here Thank you for your shares!
Tube of Choice: I am using a beautiful tube by Jennifer Janesko which you will need a licence to use. Her tubes are sold at CILM.
Mask of Choice: I am using 226 Mask kelsWWA. If anyone knows the site for these, please let me know so I can add the credit to this tut, ty.
Thank you for sharing your talent with us!
Fonts of Choice: Coventry Garden and Pixelette

Now before we start remember that this tut is only a guide, your imagination and talent will make this tag your own!

Open a New Layer 650x400 white or depending on your forum you may choose to make it black and we will resize later.
copy and paste paper 6 as a new layer.
Go to Layers-Load/Save Mask-load mask from disk, choose your mask or use the one I used.
Source luminance-fit to layer-invert transparency ticked-hide all mask-then load. Back to layers-merge-merge group.
Duplicate mask and on the original go to blur-gaussian blur-15

I added some embellishments beneath the mask layer and then on top I added the red hearts.
Next I added frame 5. Rotate the frame as you wish. Click on this frame and add your tube, size it to fit and erase the parts you don't want hanging out.
Sometimes it's easier to duplicate the tube and erase the parts as you go. I added embellishment 29 and resized to fit on the frame. I also added embellisment 19 and resized and mirrored this to go over the frame and tube.
You can either drop shadow as you go or at the end, no rules as to how you do it!

I didn't resize my tag. I added my copyrights using the pixelette font and then added the name using coventry garden.

Now you can save your tag as a PNG (x out background layer for forums) or JPEG.

Thank you for trying my tut!

Written and created by JustJo63 6th April 2009

Friday, April 10, 2009

♥A Thank you goes a long way♥

I was sitting here thinking about how much it costs to leave a thank you on someone's blog. Perhaps a minute or two out of your day? That's not much of a cost is it? I think not. You look at how many people out there make scrapkits, templates, masks, layouts, elements, wordart and more for nothing, zilch, zip...FREE!!! Why? Because they love doing it, that's what I think. Yes there are many out there who do sell their kits etc. for one reason or another, that's up to them and it's up to us whether we buy it or not. If they are clever enough to make these things, why not sell them and good on em for doing it! So back to the freebies. Many very talented people out there are making freebies and PTU, if you can't afford to buy but you can afford the time to go to their blogs and grab their freebies, then don't forget to leave a thank you..it really does go a long way and the cost...FREE!

A very special thank you from me to all of the very talented people out there making their gorgeous freebies available to us, you are very much appreciated...thank you♥

Jo x x x

Third Tut ~*A Kiss From The Stars*~No Scrapkit


For this tutorial you will need a working knowledge of PSP and Animation Shop. If I explain this properly, hopefully it will be an easy tut! I use PSP 9.

Supplies: One of the very cute tubes from Suzanne Woolcott here . I'd say one of the most popular artists around!
Some clouds and stars, I found mine in my extras folder, so if they're yours, please let me know so I can give credit.
Alien Skin Xenofex2~constellation
Mask~Chat%2D%Mask 202, I don't know who this belongs to but if you do recognise it, please let me know so I can give credit.
Fonts of Choice: VTKS Dear Love and Pixelette


Now before we start remember that this tut is only a guide, your imagination and talent will make this tag your own!

Open a New Layer 500X500 background black New layer colour of choice to match your tube
Go to Layers-Load/Save Mask-load mask from disk, choose your mask Source luminance-fit to canvas -invert transparency ticked-hide all mask-then load. Back to layers-merge-merge group. I added the copyrights to my mask layer.
On your background layer add some stars and clouds and then place your tube in amongst the clouds.
Now X out your Tube, cloud layers and your mask layer and merge your background and stars together, Layers-Merge-Merge Visible.
Duplicate this merged layer twice, for a total of 3 layers and rename them, Merge1, Merge2 and Merge3. X out Merge2 and 3.
Make sure you have highlighted the Merge1 layer.
Go to Effects-Plugins-Xenofex-Constellation
Settings I used are:
0.85-50-50-25-50-75-45 Keep Original Image selected Random Seed1
Copy merged into AS
X out Merge1 and go to Merge2.
Back to Constellation and hit the random seed button once.
Copy merged into AS And paste after current frame.
X out Merge2 and go to Merge3.
Back to Constellation and hit the random seed button once.
Copy merged into AS and paste after current frame.
View your animation and then save as a gif!
Add names the way you normally would to an animation, I know everyone has a different method of doing this.
Or you can add your name when you add the copyrights.

Thank you for trying out my third tut any similiarities to any other tuts is by coincidence only or great minds think alike..lol
If you'd like to show off your tag email me cutiepie_2468@hotmail.com I'd love to see what you've created.

Written and created by JustJo63 30th March 2009

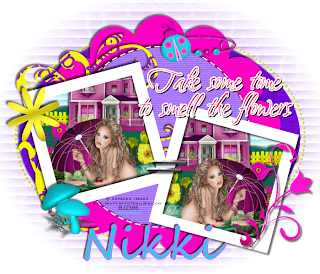
Second TUT~TAKE SOME TIME~FTU


For this tutorial you will need a working knowledge of PSP. I use PSP 9.

Supplies: Scrapkit is called Blissfull Colors from Scrap Dimensions, ty Doris, just gorgeous!! The kit can be found-here

Tube of Choice: I am using a beautiful tube by Barbara Jensen which you will need a licence to use. Her tubes are sold here

Mask of Choice: I am using one of the fantastic masks from Zuzzana, zuzzanna blind mask.
You can get her masks here
Thank you for sharing your talent with us!
Tag Template #3 by Cinnamon Scraps, which you can find here What great templates, ty!!

Fonts of Choice:Segoe Script and Pixelette

Now before we start remember that this tut is only a guide, your imagination and talent will make this tag your own!

Tag 1~this will be used to put into the template, so here we will make something pretty and fun!

Open a New Layer 650x650 background white and we will be resizing it before we use it on the template.
Either open a new layer and use a colour of your choice or use a paper and copy and paste that as a new layer.
Go to Layers-Load/Save Mask-load mask from disk, choose your mask or use zuzzana blind mask.
Source luminance-fit to canvas-invert transparency unticked-hide all mask-then load. Back to layers-merge-merge group.

Now have some fun and make a scene, filling it with grass, flowers, the house and ofcourse your tube. Look at
my finished tag as a guide.

I resized the finished tag to about 400x400 you can make it smaller if you wish. Save your tag so it doesn't get lost
if your PSP shuts down..we all know this has happened to many of us!!


Tag 2~Open your template and delete the copyright layer. Resize the background layer to whatever size you wish and copy and paste paper 1 and use your deform tool to make it fit the whole tag. I used zuzzana's blind mask and repeat the same as the first tag.

The best way to to fill each layer with the papers of your choice is to copy and paste them, use the deform tool if they're not quite big enough for the layer, then go to Selections-select all-float-defloat-invert-delete. This gives a smoother edge.

On the left frame and right frame backgrounds, use your wand, click inside each one, one at a time and paste the tag we made earlier, mirroring it for the right frame and each time invert, delete. Place these under the left and right frames, which I left white.

I left the wordart as is, you may choose to change the colour etc.

Add any elements from the scrapkit, there are so many to choose from!
I know the next step everyone can do differently but I go back through each layer and delete the originals, leaving the paper layer and then add dropshadows, mine vary. The only layers I don't delete are the right and left frames and right and left background frames. Add dropshadows of choice to them too.

Now resize the tag if you wish and then add copyrights. Copyrights are written in Pixelette size 6 stroke 0 anti-alias off.
For the name I've used Segoe Script, size 72 dropshadow -3 -3 60 black and dedicated it to my very dear friend Nikki.


Add your name and save as a png or jpeg. For forums I like to either change the background to black or x out the background and then save as a png.


Thank you for trying out my second tut any similiarities to any other tuts is by coincidence only or great minds think alike..lol
If you'd like to show off your tag email me cutiepie_2468@hotmail.com I'd love to see what you've created.

Written and created by JustJo63 28/29th March 2009

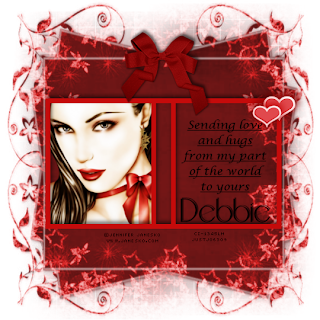
FIRST TUT~SENDING LOVE AND HUGS ACROSS THE WORLD~FTU


For this tutorial you will need a working knowledge of PSP. I use PSP 9.

Supplies: I have used a paper from Monica's Happy New Year Party, the kit can be found here
Thank you for so many wonderful shares! The bow and hearts I have saved in an extra's folder collected over the years.
If you recognise them please let me know and I will give credit to you.
Tube of Choice: I am using a beautiful tube by Jennifer Janesko which you will need a licence to use. Her tubes are sold at CILM
Mask of Choice: I am using one of the fantastic masks from Zuzzana, zuzzanna_mask60.
You can get her masks here Thank you for sharing your talent with us!
Fonts of Choice: Lucida Calligraphy, Reisling and Pixelette

Now before we start remember that this tut is only a guide, your imagination and talent will make this tag your own!
Open a New Layer 600x600 white or depending on your forum you may choose to make it black and we will resize later.
Either open a new layer and use a colour of your choice or use a paper and copy and paste that as a new layer.
Go to Layers-Load/Save Mask-load mask from disk, choose your mask or use zuzzana_mask60.
Source luminance-fit to canvas-invert transparency ticked-hide all mask-then load. Back to layers-merge-merge group.

Go to your rectangle tool and up the top where it says Mode click on the square-width 10 and draw a square big enough to fit
a tube on one side and because we are going to duplicate it, a message and name on the other side. Convert to a raster layer and
add a drop shadow -4 2 55 10 black now duplicate and then mirror it. See my tag for reference. Merge down and the boxes will now
be merged as one layer. Go to your tube and either resize it now or paste as a new layer and resize it to fit on one
side of the box, use your magic wand to click inside the box, go to selections-modify-expand by about 4-invert and then hit delete
and make sure you are on the tube layer when you do this. Move your tube below the box layer. I've added a bow and a couple of
hearts but you can add any little extras you like.

I like to resize my tag now before I add any writing or copyrights. I've made my tag 540x540 or leave it as is.

For the message I've used Lucida Calligraphy size 14 underlined in black. You can use the message I have or use your own.
For the name I've used Reisling, size 48 dropshadow -2 2 60 black and dedicated it to my very dear friend Debbie.
Copyrights are written in Pixelette size 6 stroke 0 anti-alias off.

Now you can save your tag as a PNG (x out background first then save for forums) or JPEG.

Thank you for trying out my very first tut any similiarities to any other tuts is by coincidence only or great minds think alike..lol
If you'd like to show off your tag email me cutiepie_2468@hotmail.com I'd love to see what you've created.

Written and created by JustJo63 25/26th March 2009

My Layout

Well I was going to do something fancy this Good Friday, April 10th, 2009 but after getting very frustrated I decided to go with a header for now. I made the header from a freebie I found by Kawouette here there are quite a few other freebies there too, ty so much for your shares!

Nikki also made me a blinkie, ty so much sweetie, I love it! I worked out how to add it per her instructions and I also added hers, yay!!

My twins are now 22, I can't believe it and it was sad to think it was their first time away from their family and NO cake!!

I want to wish everyone a very happy and enjoyable, but mainly relaxing Easter. The EB will be hopping my way, even though I've already had some chocolate..lol.

Now I am off to work out the rest of the blog layout to post some tuts and tags....stay tuned!

Jo x x x

Wednesday, April 1, 2009

Tut Tut Tut

Hellooooooo, yes it's me again..I now know that at least 2 friends have read this blog..LOL

Well I've been tutting. So far I've written 3 tuts and another one is on the way. Now I don't know if these are good enough to share here because I see sooooo many fantastic tuts around, but it can't hurt to share..lol. My good friend Nikki is going to help me work out how to post tuts, tags and layouts and get this blog up to scratch. I also need help in how to post a blinkie and the links to tuts and blogs. Another lovely friend of mine has started writing tuts, her name is Karen and when I figure out how to post links, I shall just have to put her blog on here also. I can't believe how many talented friends are writing tuts, I feel honoured to know them!!

I haven't been able to get online as much as I'd like to lately. Mike (my other half) is looking for work as am I but times are tough. Let's hope that someone will employ a couple of old people with many talents soon...LOL.

I can't believe that my twins are turning 22 on April 6th. Sadly they are in Tasmania, so it will be a long distance celebration this year. I don't think I'll ever get used to them not being close by, especially now Aidan is here. He turns 1 on the 25th May, we hope to go down to celebrate his birthday. We're also hoping that Matt and his g/f Kiah can come too, it all depends on money and work.

Sarah has almost finished filming for the documentary she'll be in. Next Monday she has a whole day of filming and still shots and then we wait for it to be on tv in July/August.

Not too much else to add today, so it's a short post, if I think of anything else I'll let ya know..lol.

Jo x x x